Hi, friends! Today, I’m sharing three cards featuring Spellbinders’ gorgeous Timeless Trees Collection. I love this collection so much!
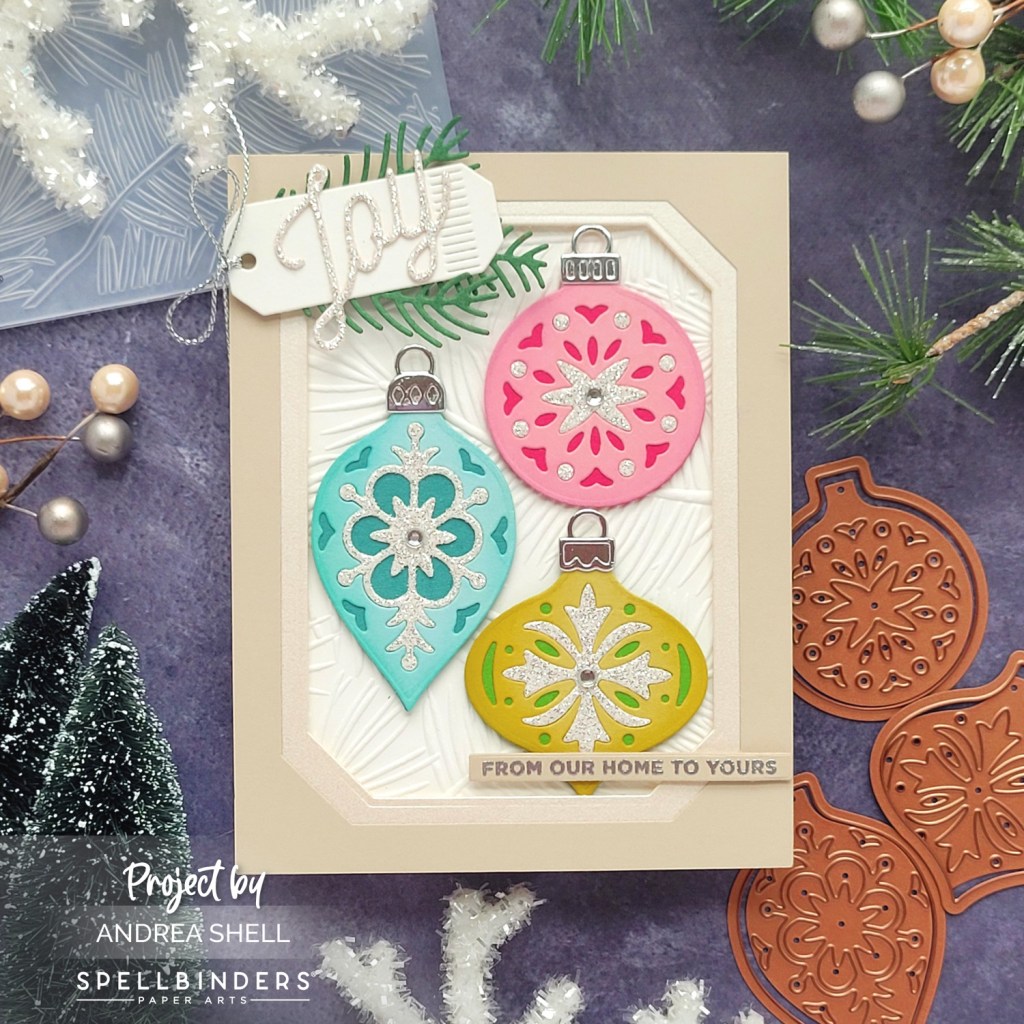
Let’s start with my favorite card using this collection. I used the Vintage Layered Ornaments Dies on this one, which was inspired by a box of vintage Christmas ornaments.
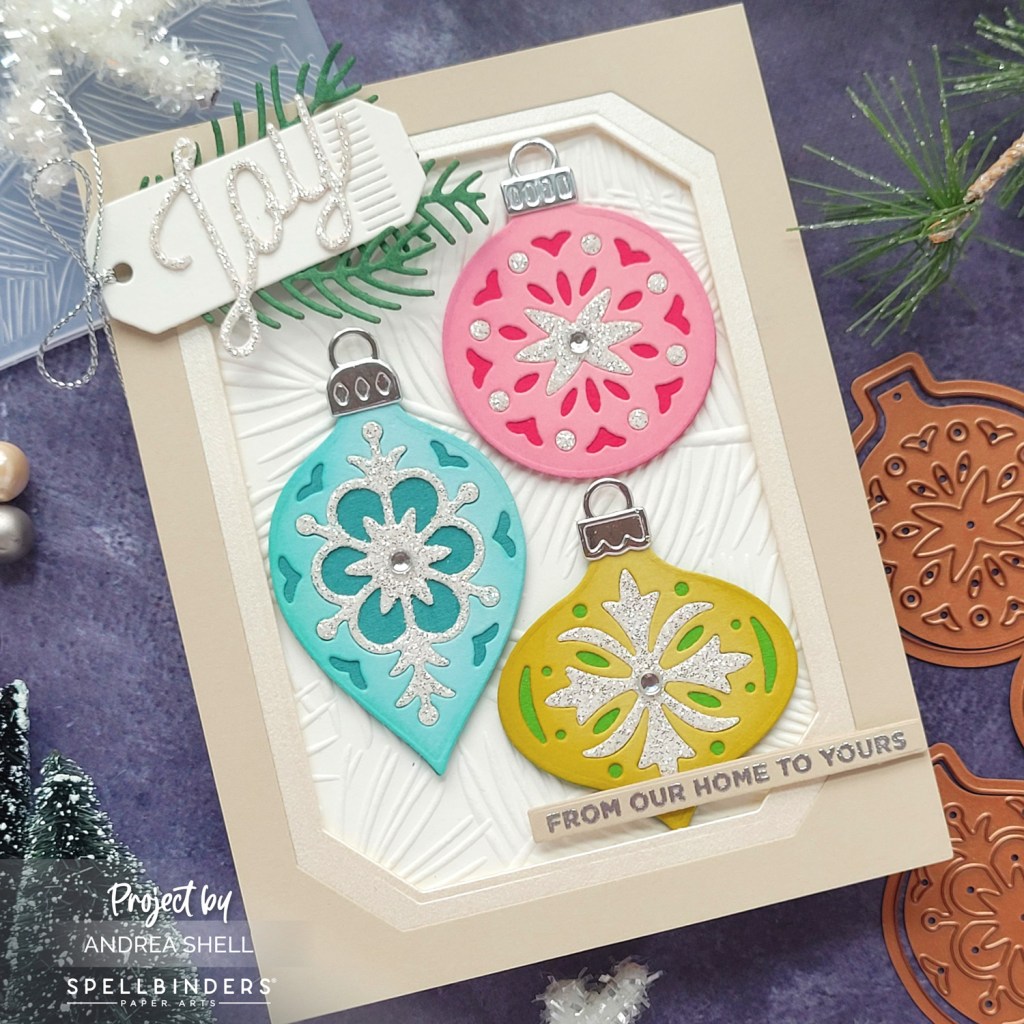
I diecut all of the ornaments from colored, glitter, and foil cardstocks. I glued the intricate top layers to the base layers and lightly blended each ornament with coordinating inks to create a little dimension. After inlaying the glitter pieces, I accented the centers with a gem.
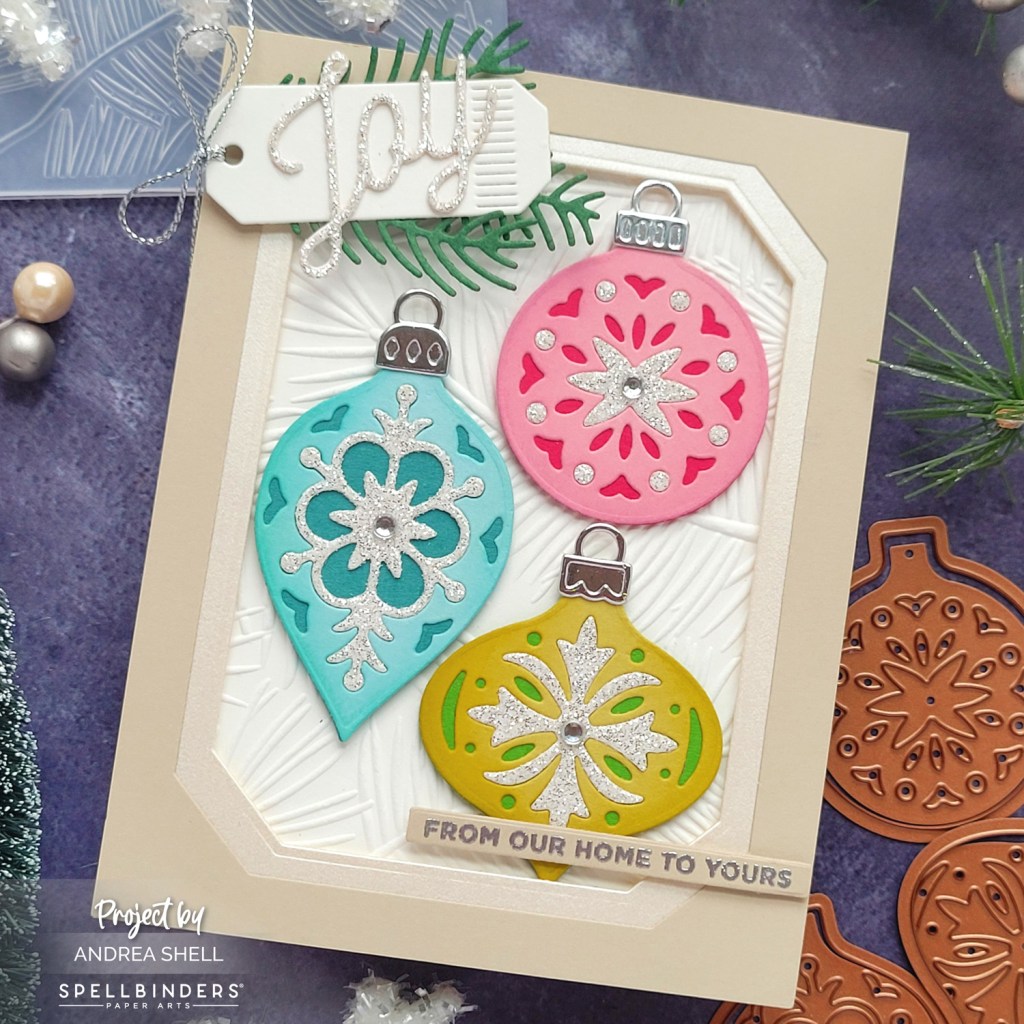
To create the “box” or frame for my ornaments, I diecut metallic and beige cardstocks with the Emerald Cut Labels and Tag Dies. I embossed ivory cardstock with the Branches 3D Embossing Folder and adhered the layered frames on top with foam tape. I tucked in the ornaments, affixing them with thin 3D foam squares.
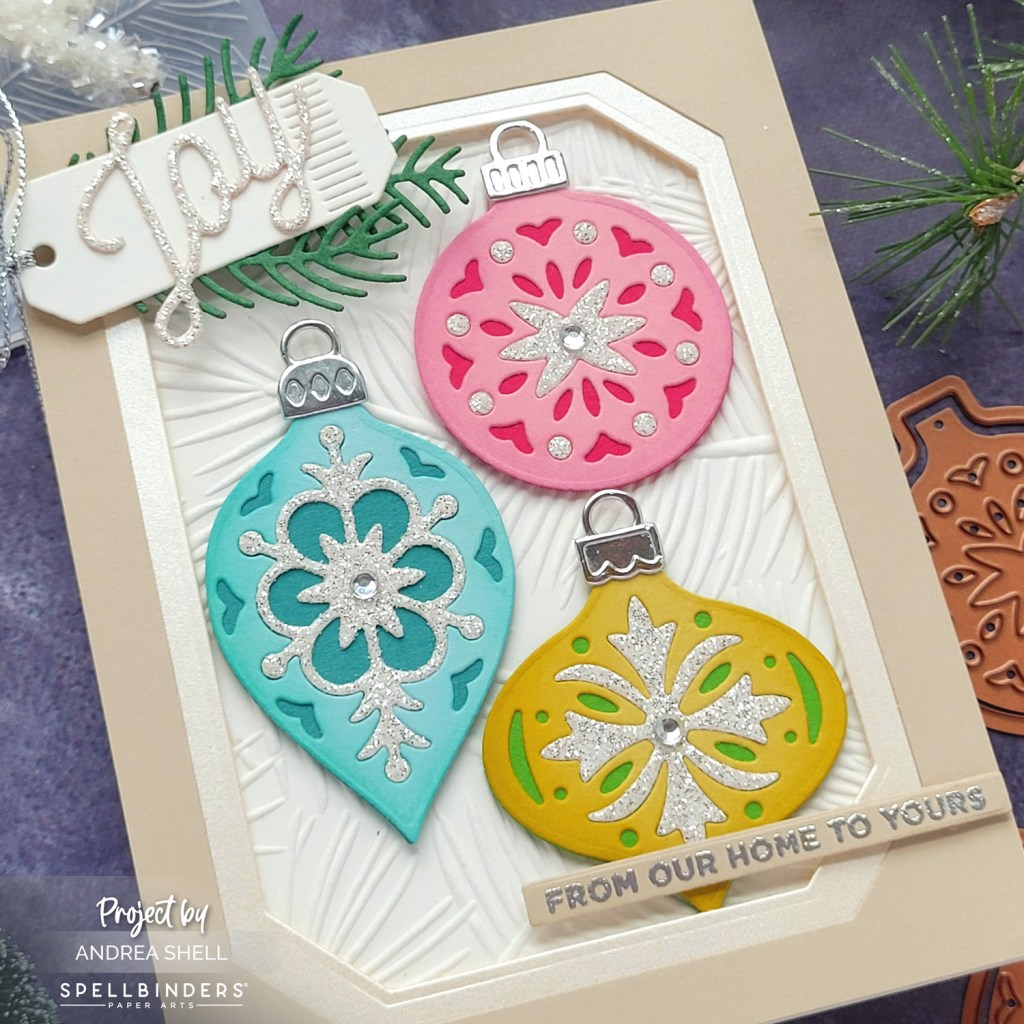
For my sentiment I diecut ivory cardstock with the tag from the Emeral Cut Labels and Tag Dies. I backed the tag with evergreen sprigs created with the Holiday Blooms Dies. I diecut “joy” with the Stocking Full of Joy Dies (retired) and glued it to the tag, which I embellished with a silver twine bow. I heat-embossed a sub-sentiment with the Mini Christmas Greetings stamp (retired) and popped that up with foam.

Now, I’m a traditionalist when it comes to Christmas trees, but I couldn’t resist making a pink tree with the Classic Christmas Tree Dies.

Using the Classic Christmas Tree Dies, I diecut the pieces from pink, aqua, glitter, and metallic cardstocks. I assembled each diecut with liquid adhesive.
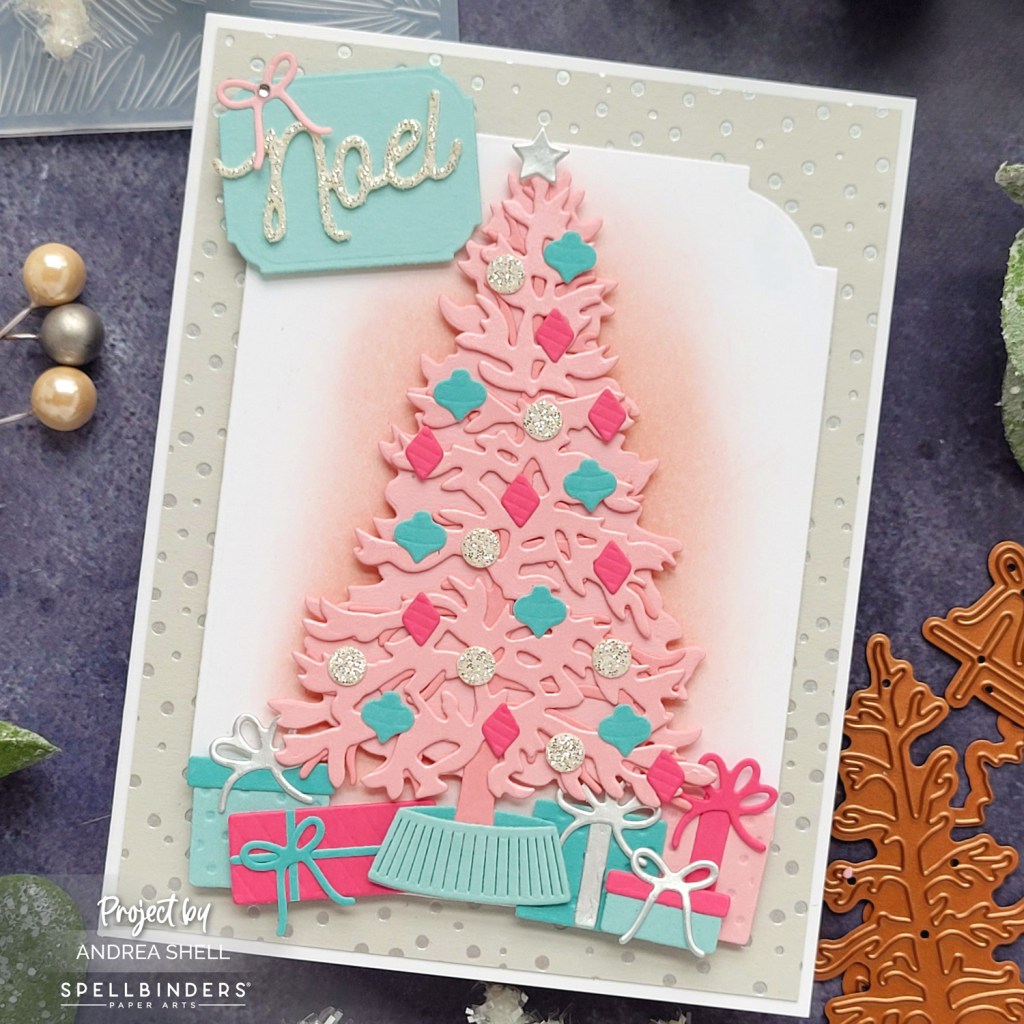
I diecut white cardstock with the Notched Corner Frames Dies and blended the center with blush ink. To create the polka dot panel, I foiled gray cardstock with the Twinkle Lights Glimmer Plate (retired) and Matte Silver Glimmer Foil. I trimmed the panel slightly, adhered it to a white card, and popped up the notched diecut with foam.

I adhered the tree with foam tape and tucked in the presents, attaching them with thin 3D foam squares. For my sentiment I diecut aqua cardstock with the Notched Corner Frames Dies and glitter cardstock with the noel die from the October 22 Card Kit of the Month (retired). I popped up the aqua diecut, glued “noel” and added a pink bow from the Classic Christmas Tree Dies and a gem.
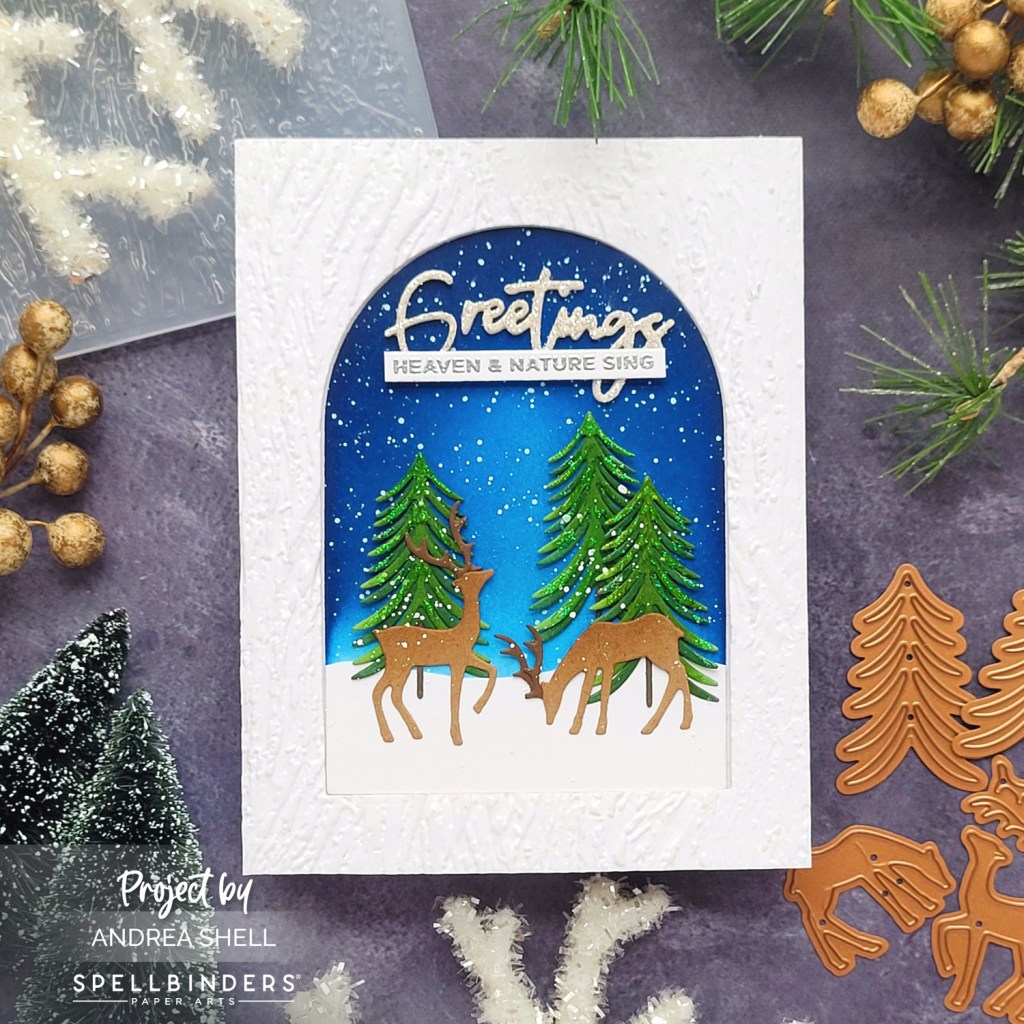
For my final project, I combined the Mantle Decorations and Whimsical Bottle Brush Trees Dies to create a wintery scene.

I diecut the deer from brown cardstocks with the Mantle Decorations Dies and the trees from green and brown cardstocks with the Whimsical Bottle Brush Trees Dies. I assembled each diecut with liquid adhesive and blended them coordinating inks for dimension.
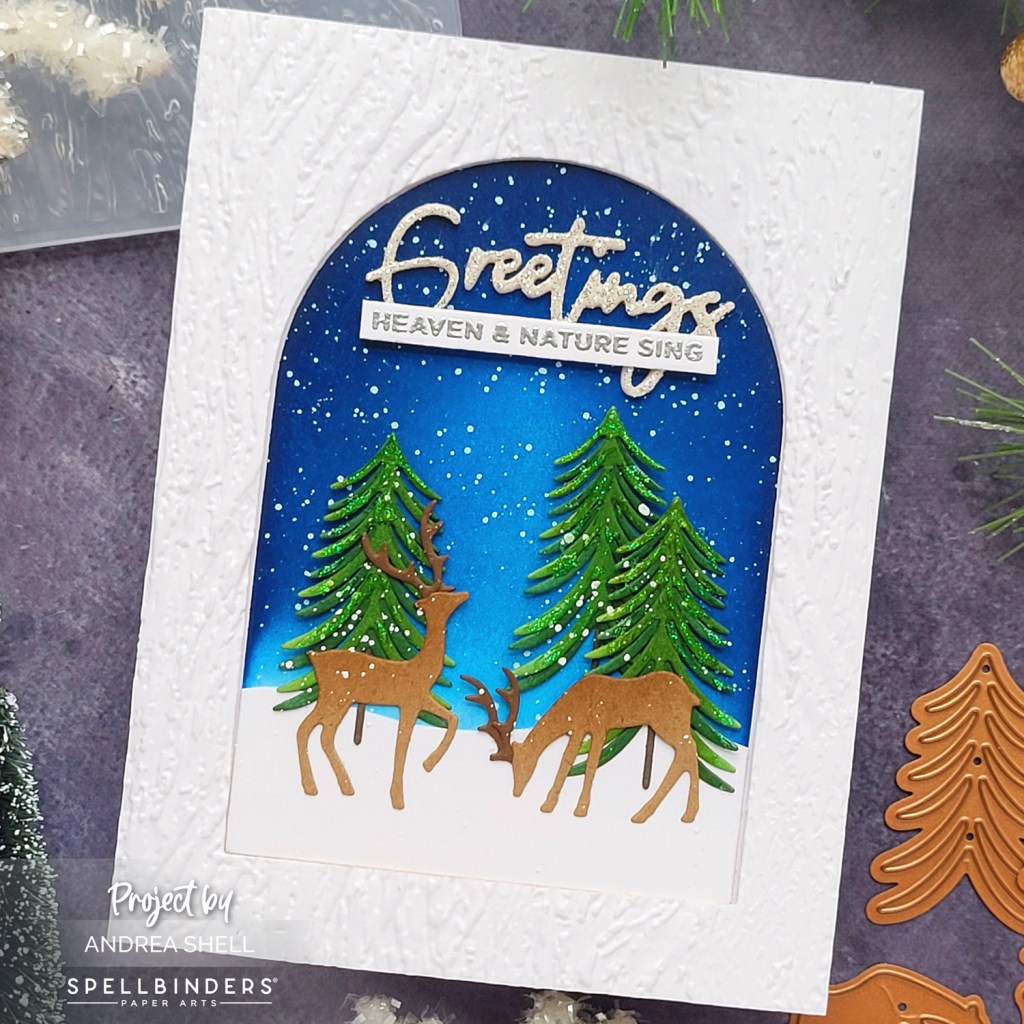
To create the frame for my scene, I diecut white cardstock with the Essential Arches Dies. I embossed the frame with the Bark 3D Embossing Folder and adhered it to a cardbase with foam tape. I blended the insert with blue inks and created a snowbank by diecutting another arch and trimming it with my scissors. I glued the snowbank to the ink-blended arch and arranged my diecuts. I splattered white paint over the scene and, once it was dry, attached the panel to my card.

For my sentiment I used the Create a Christmas Sentiment Dies (retired), which I diecut from white and glitter cardstocks. I stacked the diecuts and glued them to the background. I heat-embossed a sentiment from the Mini Christmas Sentiments stamp (retired) and attached it with foam.
Thanks for stopping by!
*Affiliate links used at no cost to you.


Leave a comment