Hello, again! I hope you’re not sick of holiday cards because I have more to share!
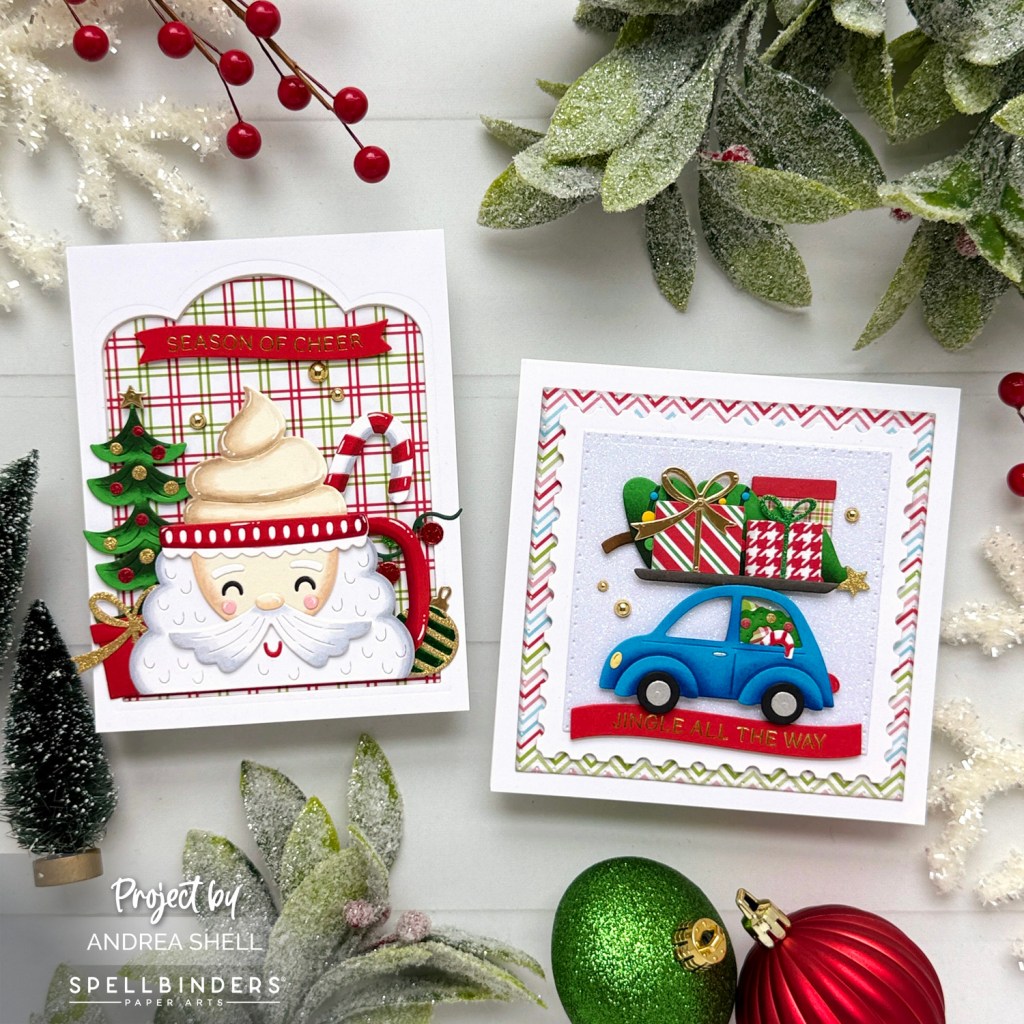
Today, I have a pair of cards created with Spellbinders’ Wonderland Collection. There are so many fun and festive products in this collection that you’re sure to be inspired to do some holiday crafting!

My first card features the Yuletide Ride Dies. My brother, whose birthday happens to be in December, had a blue VW beetle when we were younger, which was the inspiration for this card.
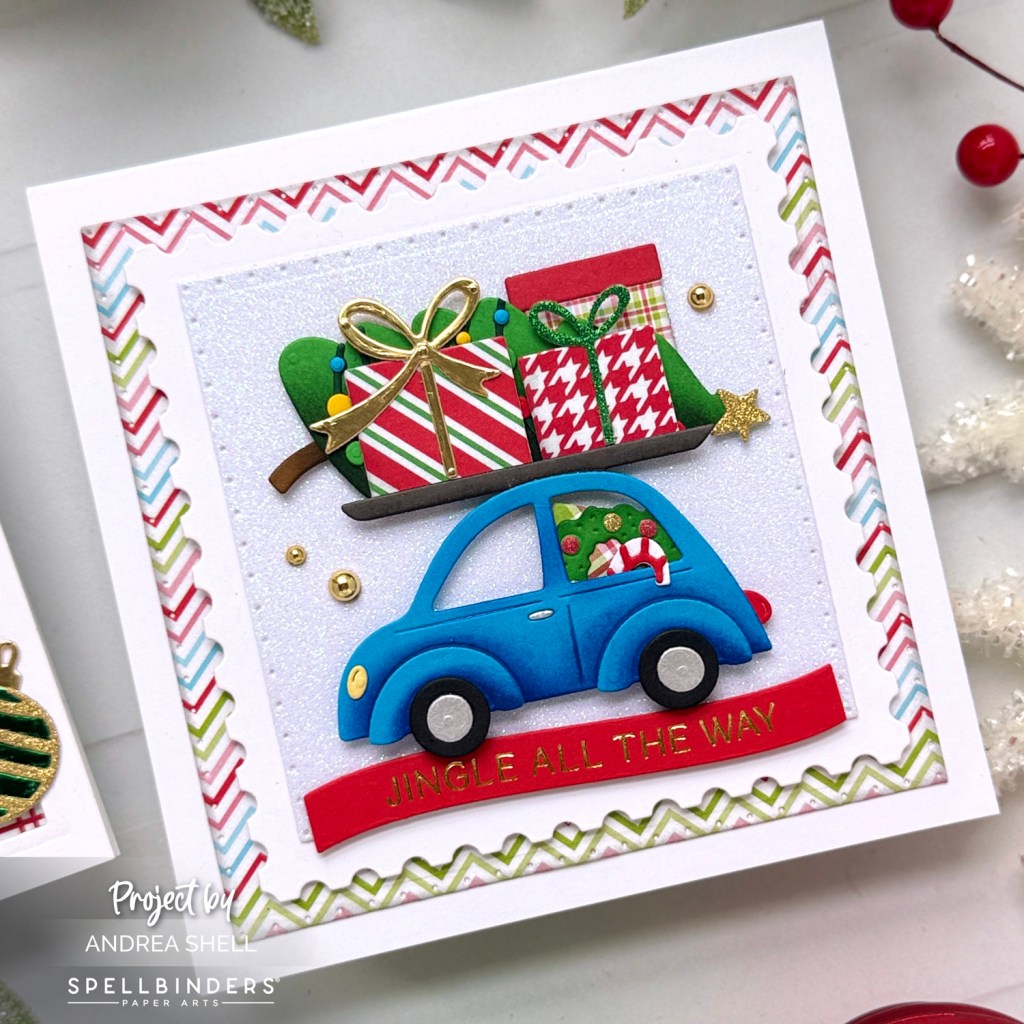
Using the Yuletide Ride Dies, I diecut the pieces for the car and decorations from a combination of colored, metallic and glitter cardstocks and patterned papers. Before assembling the elements, I added coordinating inks to some of the pieces to create dimension. Note: The small bow is from the Cocoa Wonderland Dies, which are featured in my second project.
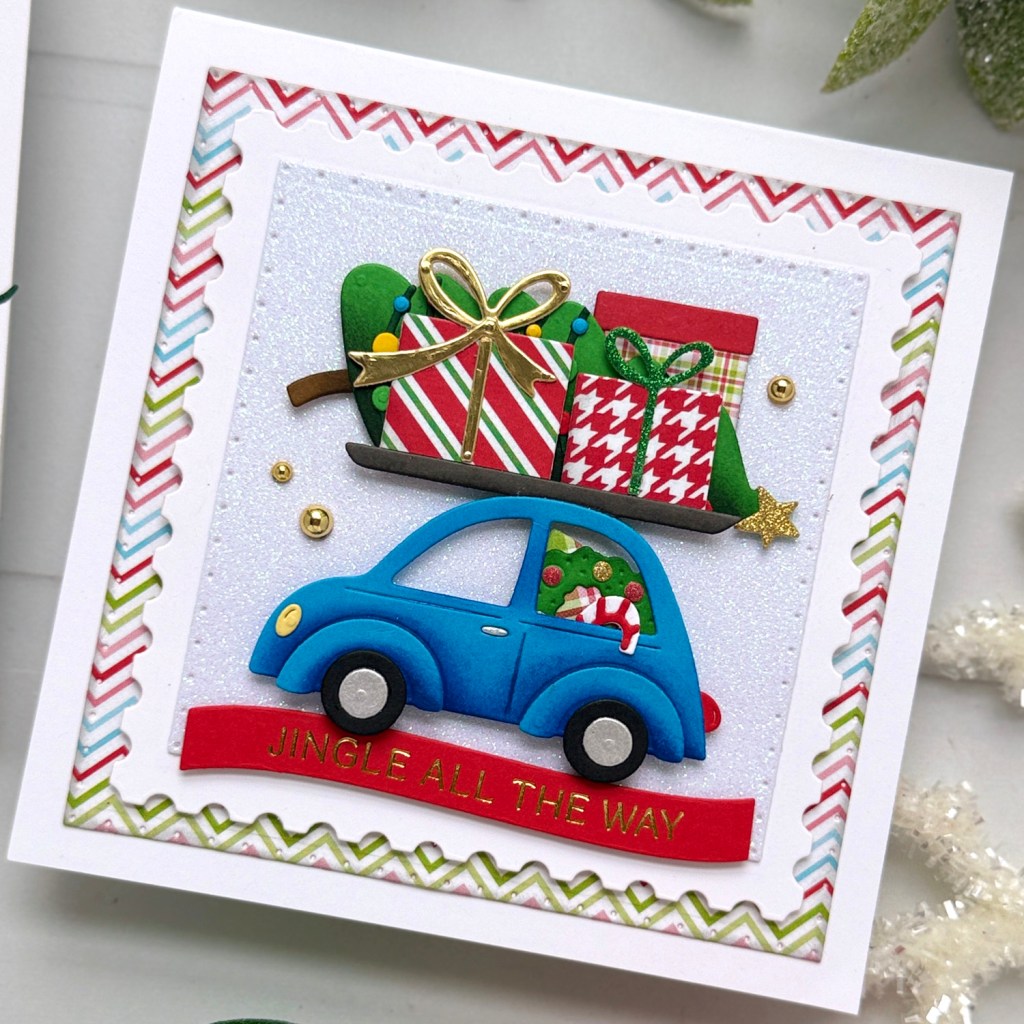
I diecut the white, glittery square and the postage square with the Postage Edge Squares Dies and layered them together. With the same die set, I diecut a square from patterned paper. I added gray ink to the edges of the large square before adhering it to a square card. I popped up the layered squares with foam adhesive.
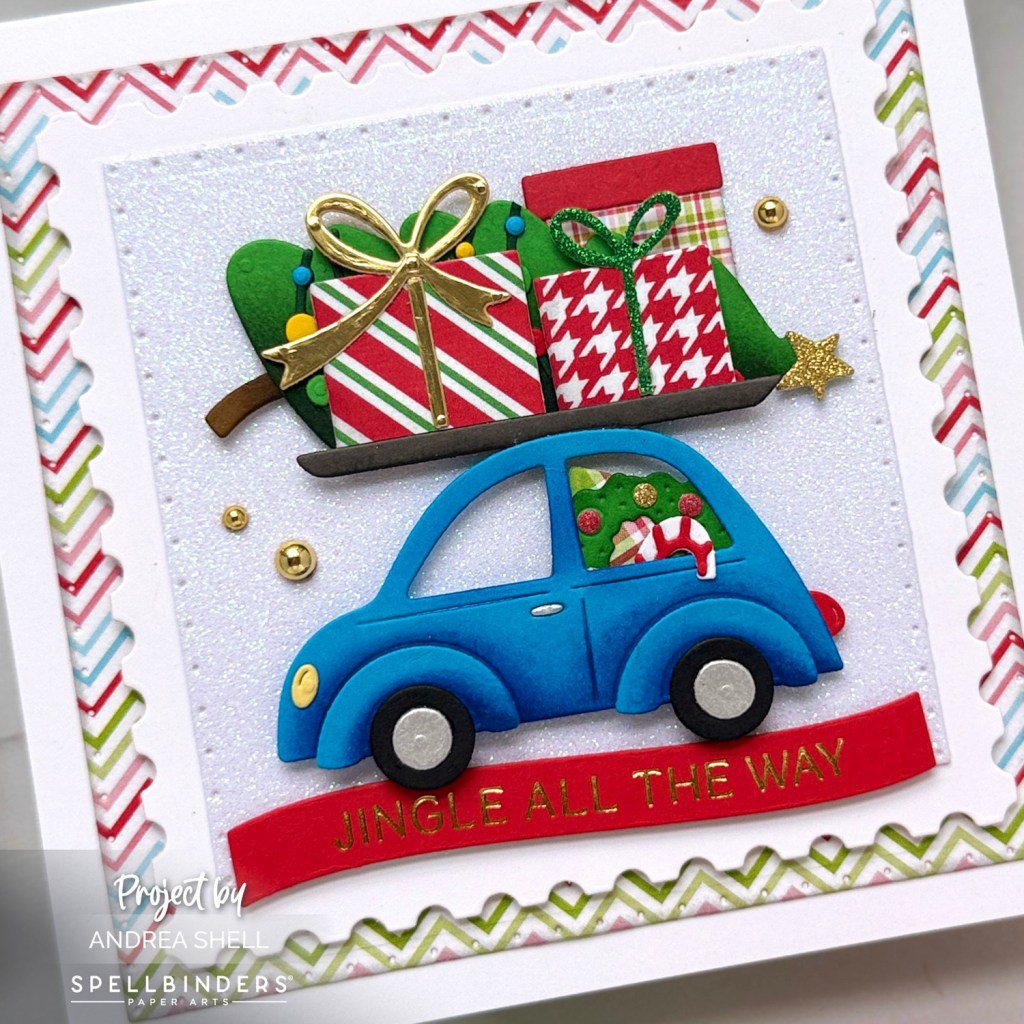
For my sentiment I hotfoiled the Mistletoe Greetings Press Plate onto red cardstock with Gold Foil and diecut it with the coordinating die. I popped up my sentiment with thin 3D foam and attached the car and decorations with thicker foam. I finished with a scattering of gold pearls.
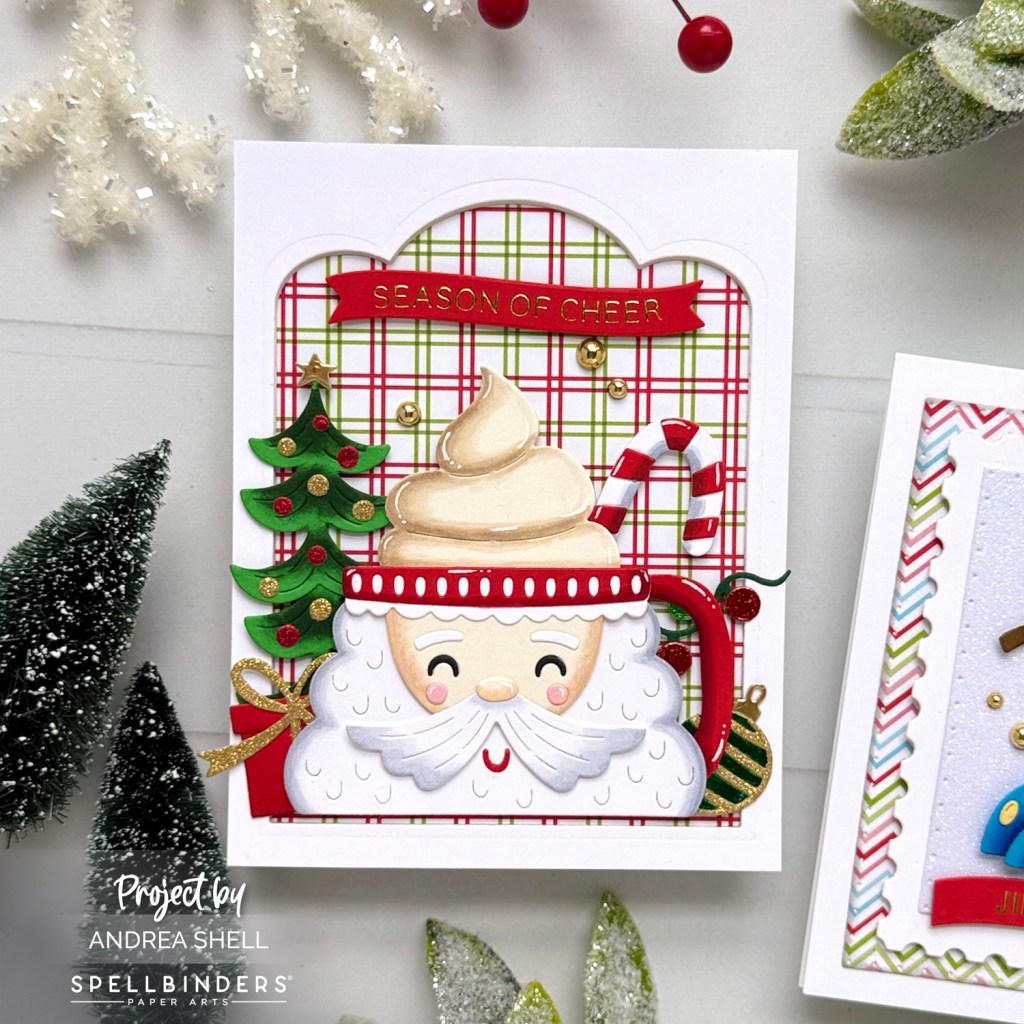
You know I love Santa, right?! Then you know I could not resist the Cocoa Wonderland Dies! I mean that Santa mug is just adorable!
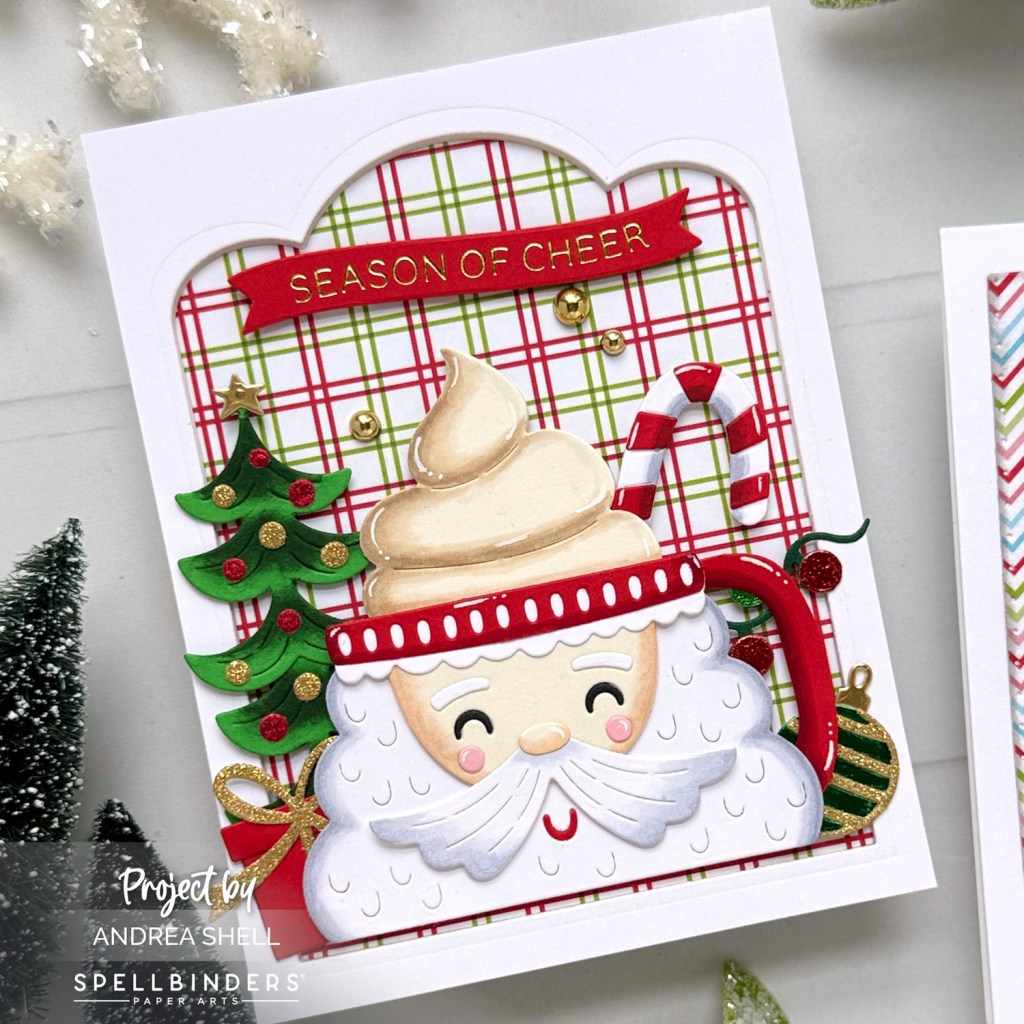
Using the Cocoa Wonderland Dies, I diecut all of the elements for the mug, tree and ornaments from colored, glitter and metallic cardstocks. The present and light strand are from the Yuletide Ride Dies, and the candy cane is from the July 2023 Die of the Month set. I used Copics to add dimension to the mug (pre-assembly) and candy cane (post-assembly). I used dye inks on the present and tree. To make the tree taller, I stacked two of the tree diecuts (I trimmed the star from the bottom tree prior to stacking).

I diecut an A2 panel of white cardstock with the Scallop Labels and Tag Dies and adhered the frame to a white card with foam tape. With the same die, I diecut some plaid paper and nestled the positive diecut inside the frame’s opening. I arranged my Santa mug and other decorations onto the card, securing them with a combination of foam and liquid adhesive.

I chose a sentiment from the ones foiled previously with the Mistletoe Greetings Press Plate. I popped up the sentiment with foam and finished with a few gold pearls.
Thanks for stopping by!
*Affiliate links used at no cost to you.


Leave a comment