Hello, again! Look at me go – two posts in one week! Woohoo!
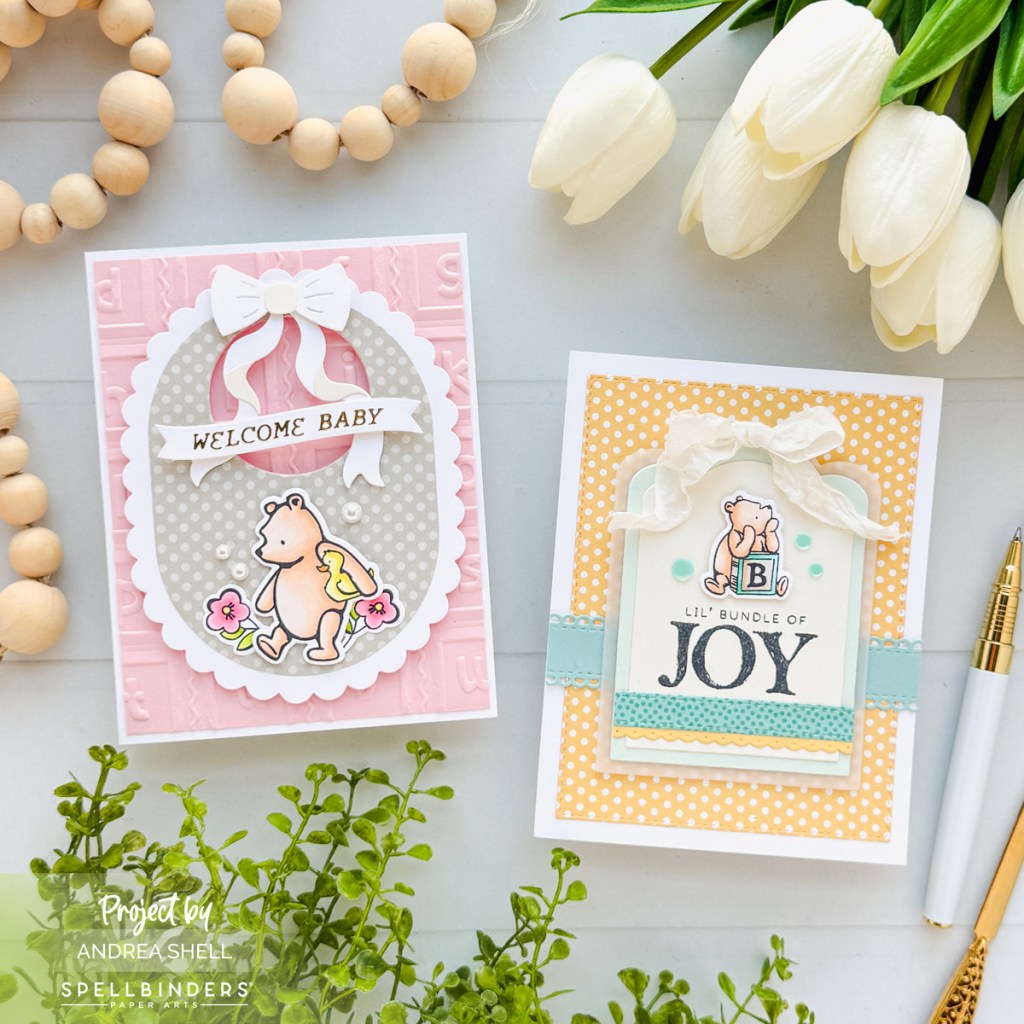
Today I’m sharing a pair of baby cards created with the Say Cheese Classic Pooh collection from Spellbinders and Simple Stories. This collection is unbelievably adorable and makes up the sweetest projects.
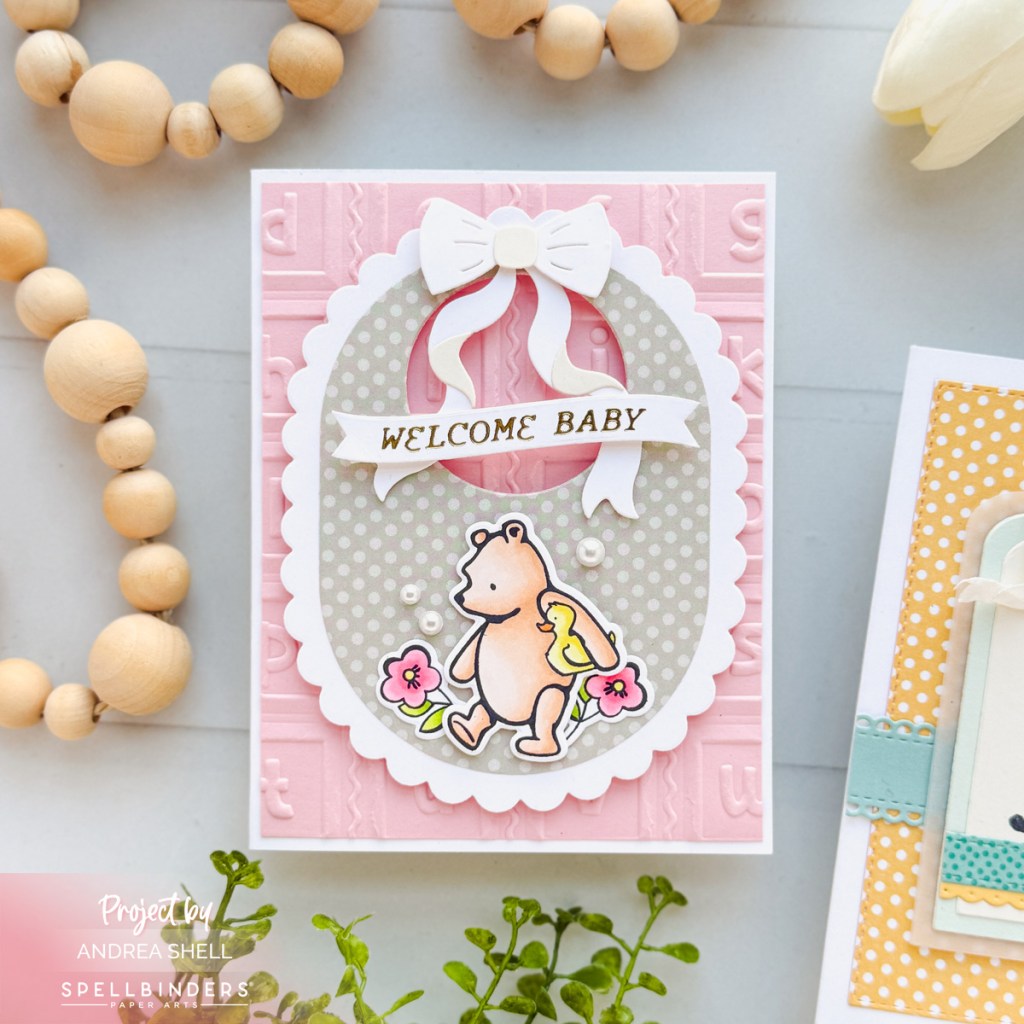
My first card features the Bundle of Joy Stamp and Die Bundle with the Classic Pooh Baby Blocks 3D Embossing Folder. After stamping the images with Memento Tuxedo Black ink, I colored them with Copics and cut them out.

To create the baby bib, I used the Scallop and Stitched Edge Ovals Die. First, I diecut white cardstock with the scallop oval die and patterned paper with the largest oval die. I adhered the two ovals together and diecut the neck of the bib with a circle die (I used one from the retired Fluted Classics Circles Dies). The bow is from the A Special Toast Dies. After assembling the bow, I attached it to the bib with thin foam squares. I also attached Pooh with thin foam and tucked the flowers behind him.
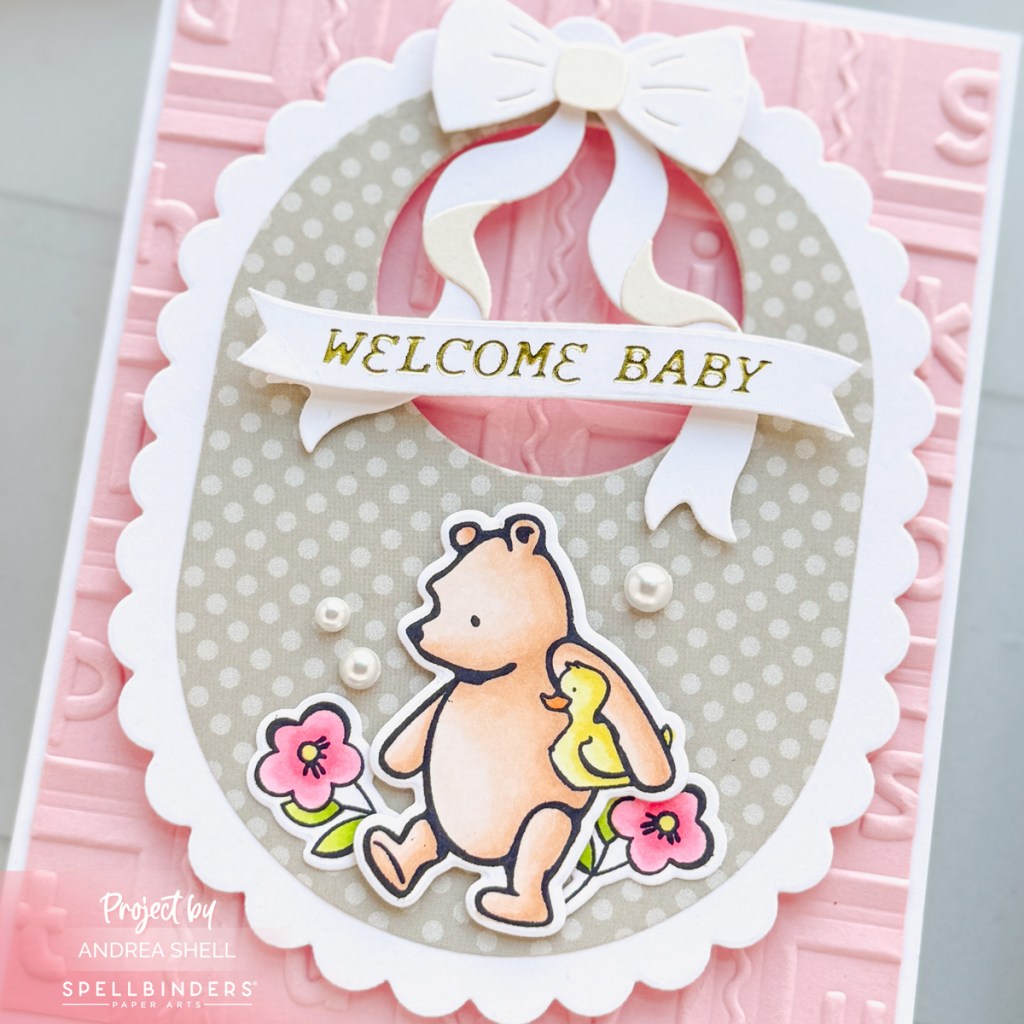
For my background I embossed pink cardstock with the Classic Pooh Baby Blocks 3D Embossing Folder. After trimming down the panel, I adhered it to a white card and attached the bib with foam tape. I finished with a foiled sentiment created with the Curved Everyday Sentiments Glimmer Plate & Die Set and accented the bib with some flat-backed pearls.
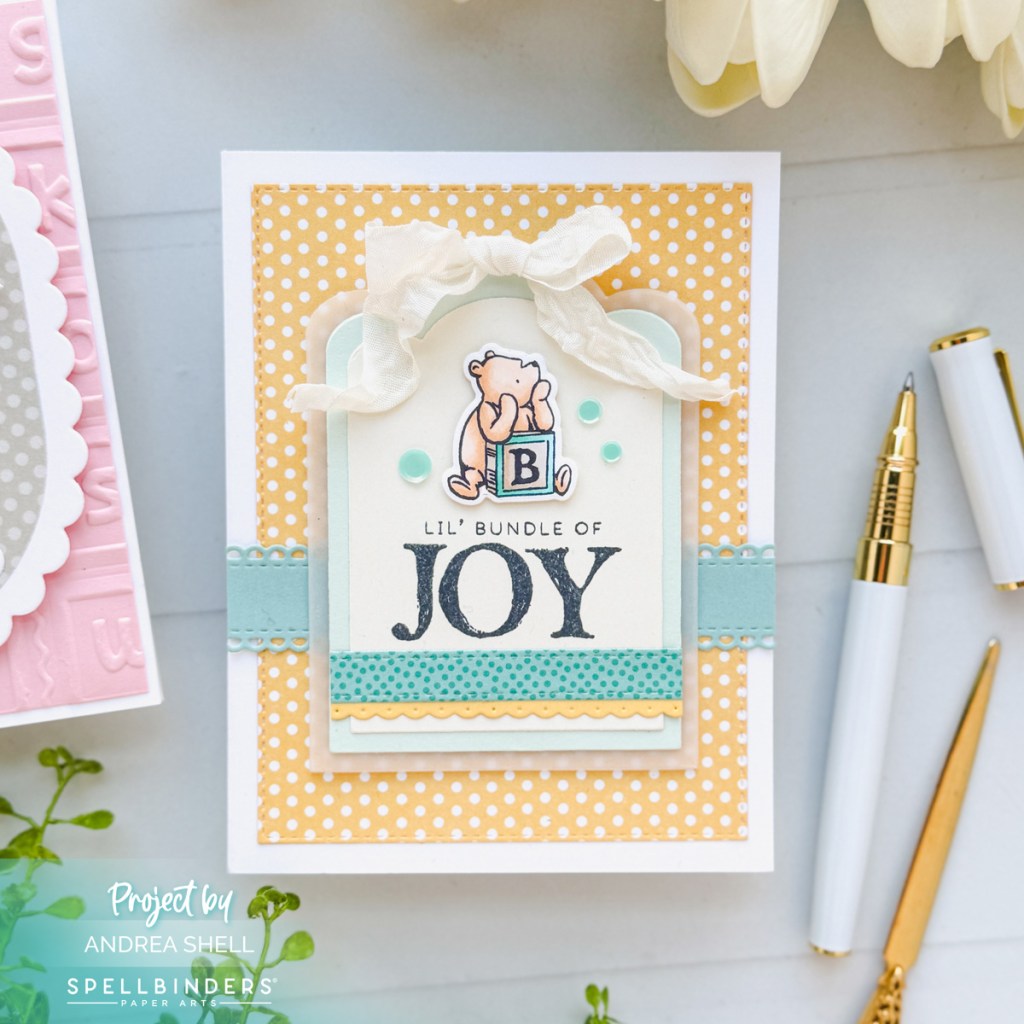
In addition to the Bundle of Joy Bundle, my second card also features the Ribbon & Trim Dies. I love the look of ribbon on a project, but sometimes it adds quite a bit of bulk and can be difficult to adhere. These dies solve both problems perfectly!
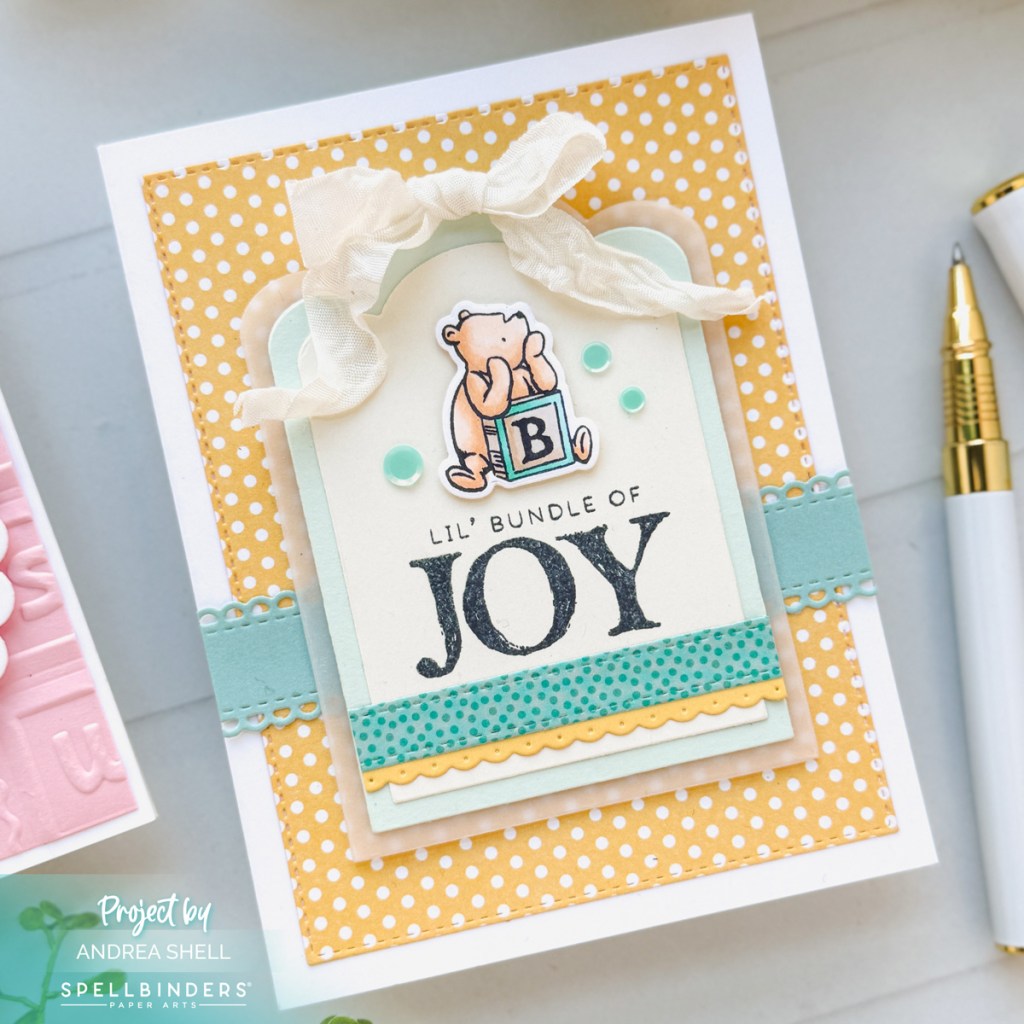
To create my focal point, I diecut ivory cardstock with the Scallop Labels and Tag Dies and stamped a sentiment from the Bundle of Joy set. Using the same dies, I diecut two larger labels – one from mint cardstock and a larger one from vellum. I also diecut patterned paper and yellow cardstock with the Ribbon & Trim Dies. After adhering the ivory label onto the mint one, I layered the two “ribbons” on top and trimmed the excess. I attached the layered diecuts onto the vellum label and popped up my colored image with foam.
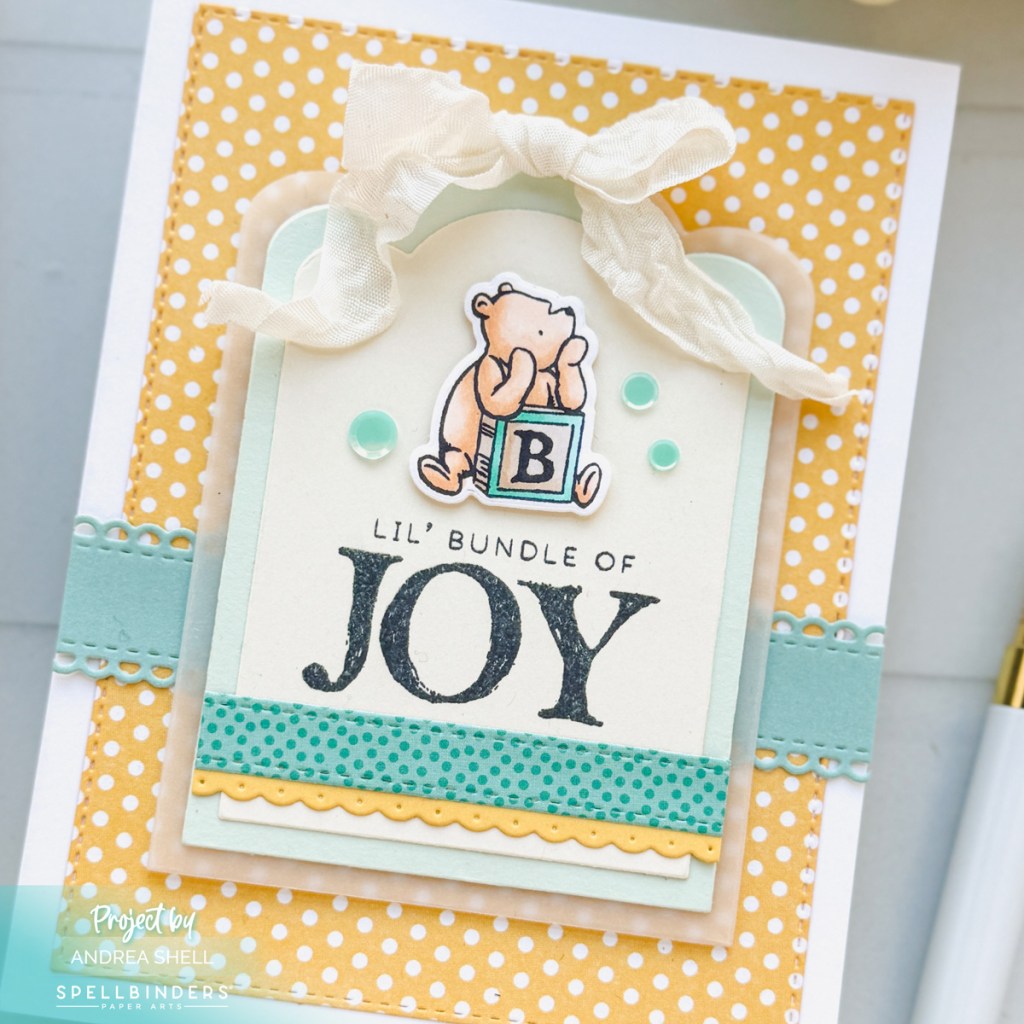
I diecut yellowpatterned paper with a stitched rectangle die from the Nested Postage Labels and Tag Dies and adhered it to a white card. I diecut the aqua “ribbon” with the Ribbon & Trim Dies, adhered it to my card, and trimmed the excess. Finally, I attached the layered label diecuts with foam and finished with a bow and some aqua confetti.
Thanks for stopping by!
*Affiliate links used at no cost to you.


Leave a comment