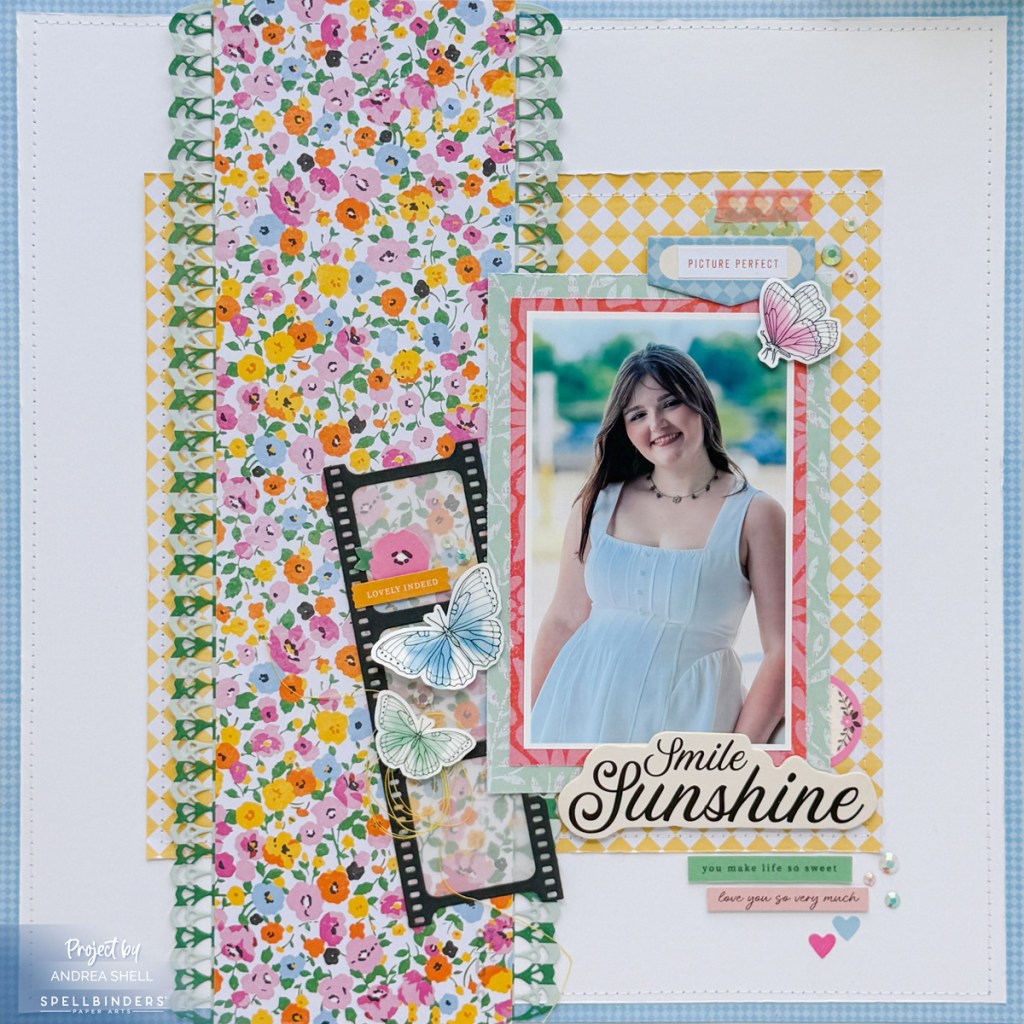
Hi there! Today I’m sharing a layout created with the Breakfast in Bed collection from Spellbinders and Rosie’s Studio.
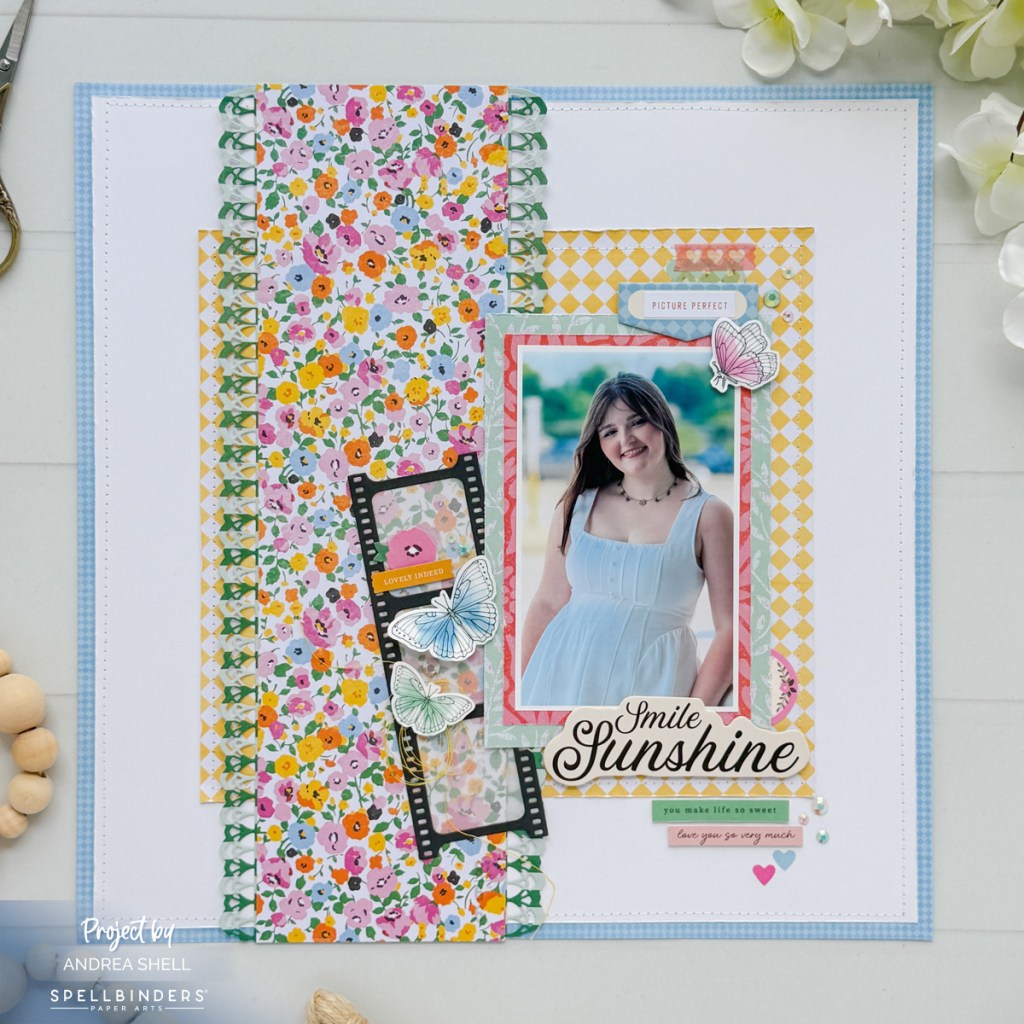
My layout features the Breakfast in Bed 12×12 Designer Paper Pack, Sticker Book and Chipboard Stickers. Despite the theme of the collection, the patterns and colors were perfect for documenting this photo of my daughter.
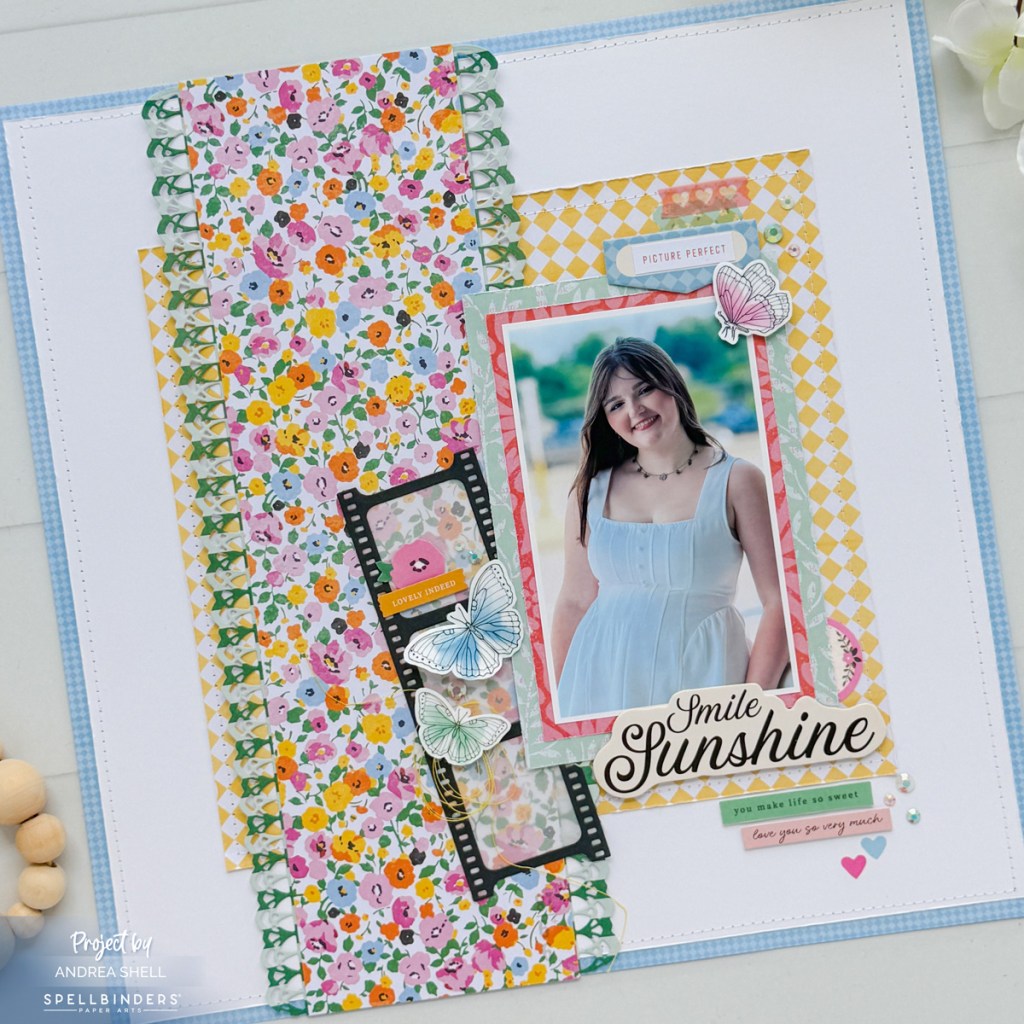
I trimmed white cardstock 1/2″ on two sides and stitched it to the blue patterned paper from the 12×12 Designer Paper Pack, ruffling the edges of the white square to add texture. Next, I trimmed the yellow paper down by several inches and stitched it to the center of my background, distressing the edges of the paper. I diecut the green strips with the Romantic Slimline Borders Dies (retired), using the partial diecutting technique to get the length I wanted. I glued the strips behind the strip of floral paper and adhered it to my layout.
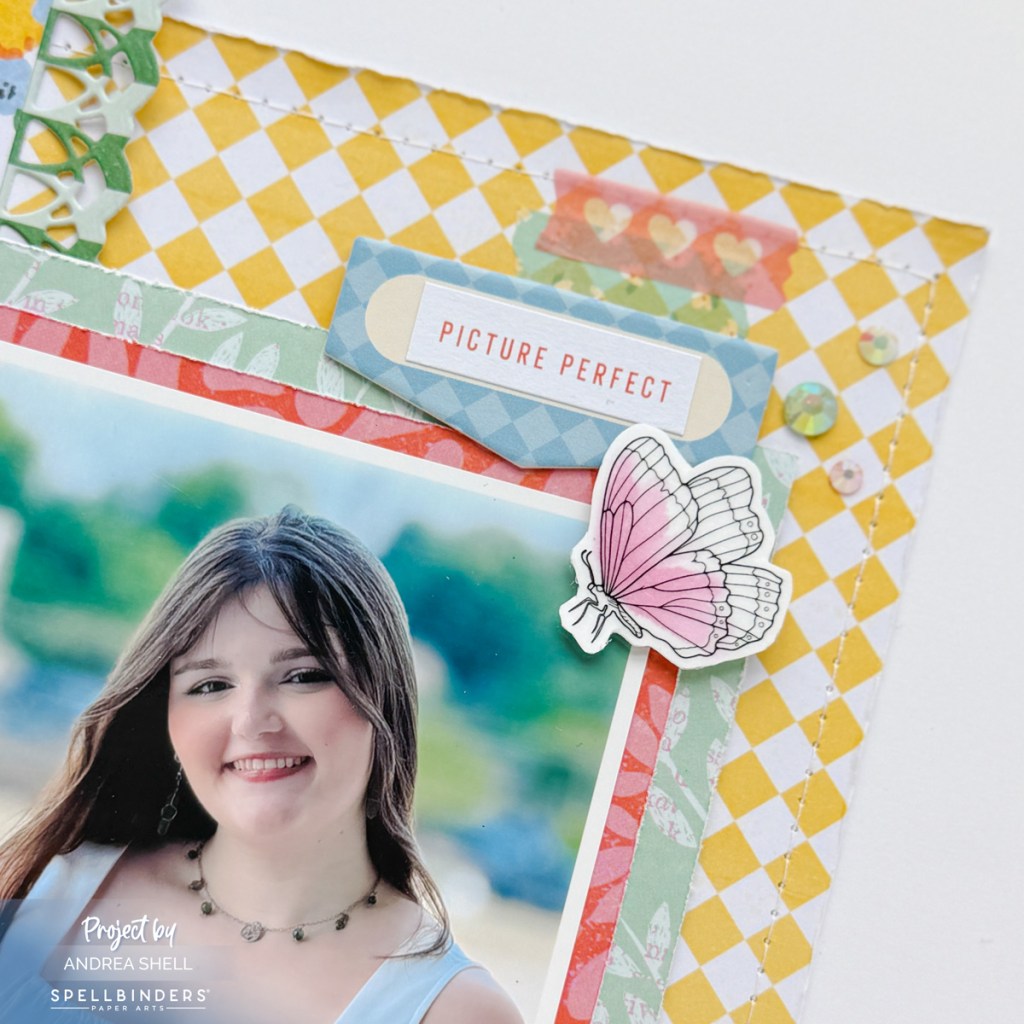
I matted my photo with two other papers from the 12×12 Designer Paper Pack, distressing the edges of each photo mat, and adhered my matted photo to the page with foam tape. I added a label from the Chipboard Stickers and a phrase sticker from the Sticker Book. Above the label I placed two washi-style stickers from the Sticker Book. I adhered the butterfly sticker, also from the Sticker Book, to white cardstock, trimmed around it, and popped it up with foam.
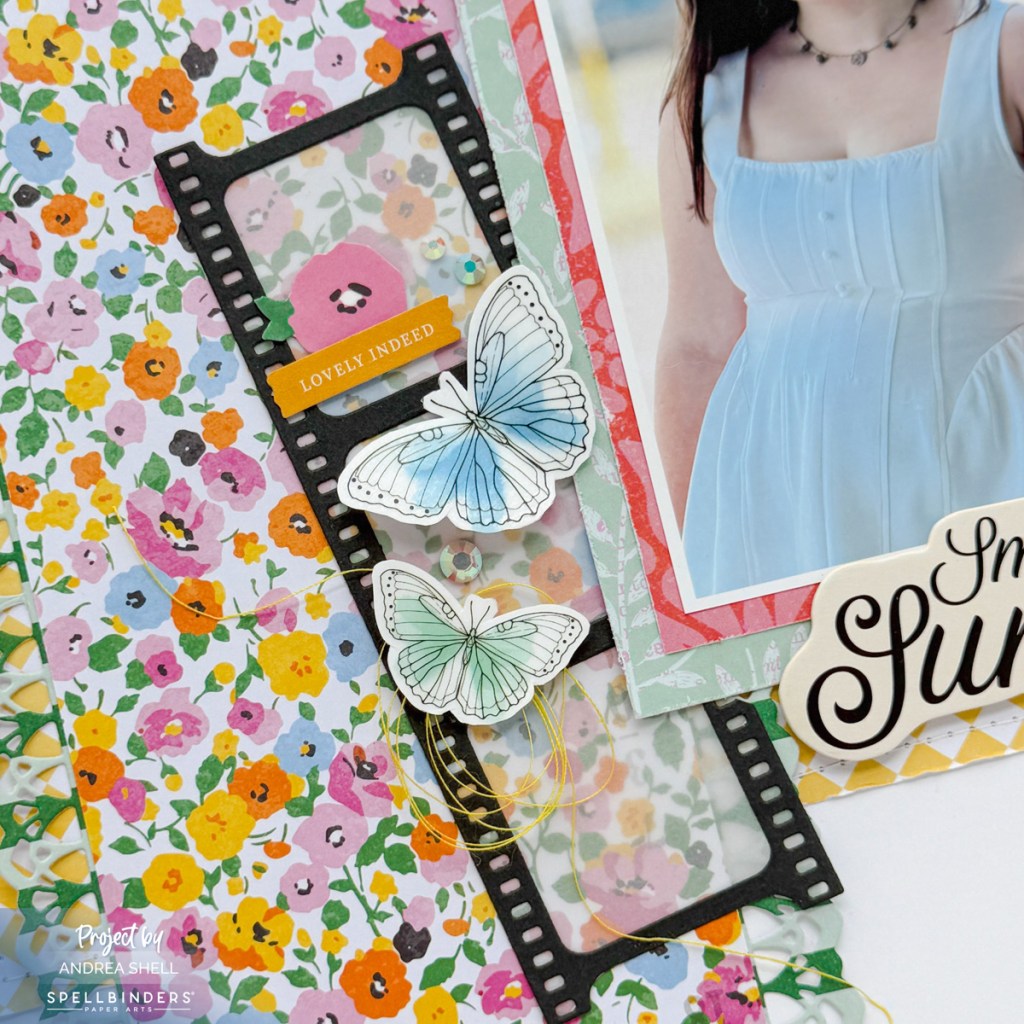
I diecut the filmstrip from black cardstock with the My Life in Pictures Dies and backed the openings with vellum. I embellished the filmstrip with stickers from the Breakfast in Bed Sticker Book. To give the stickers more heft and allow me to pop them up, I first stuck them to white cardstock and trimmed around them with scissors. I added some tangled thread and gems for a bit of movement and sparkle.
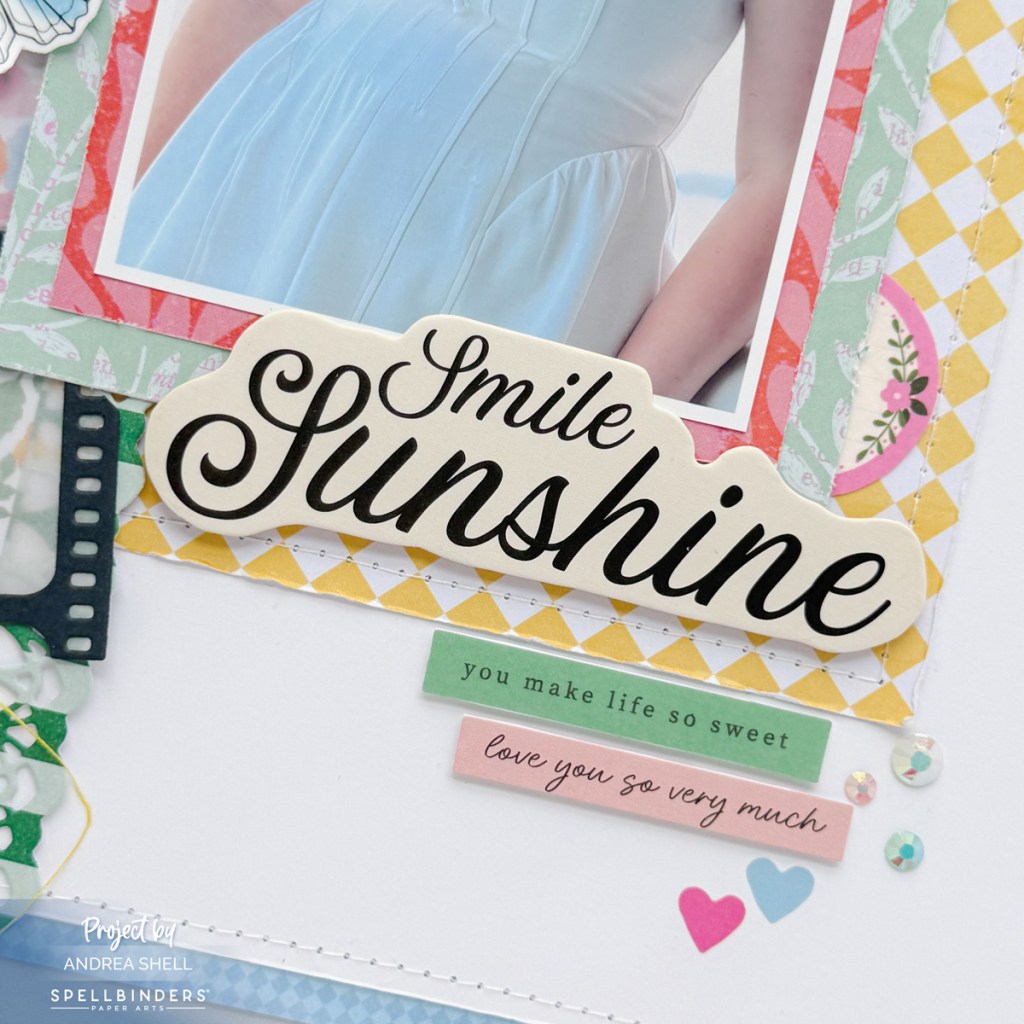
For my title I used a large sentiment from the Breakfast in Bed Chipboard Stickers. To help the title stand out, I added a few stickers from the Sticker Book. I attached the sentiment strips and circle to white cardstock and cut them out with my scissors. I adhered the strips with foam and tucked the circle (cut in half) under my matted photo. I applied the heart stickers directly to the layout and finished the cluster with a few gems.
I love how this layout turned out and really enjoyed creating with the Breakfast in Bed collection. Thanks for stopping by!
*Affiliate links used at no cost to you.


Leave a comment