Hi, friends! Today, I’m sharing some projects featuring the Crafty Babe Collection by Simple Stories and Spellbinders. This is such a great collaboration with lots of fun products for the crafty gals in your life – including yourself!
I used two of the new die sets – Crafty Tools and Labels & Icons – to create a crafty-themed birthday card and some super-cute bookmarks. The patterned paper for my projects is from an old 6″x6″ paper pad from Pebbles called Garden Party.

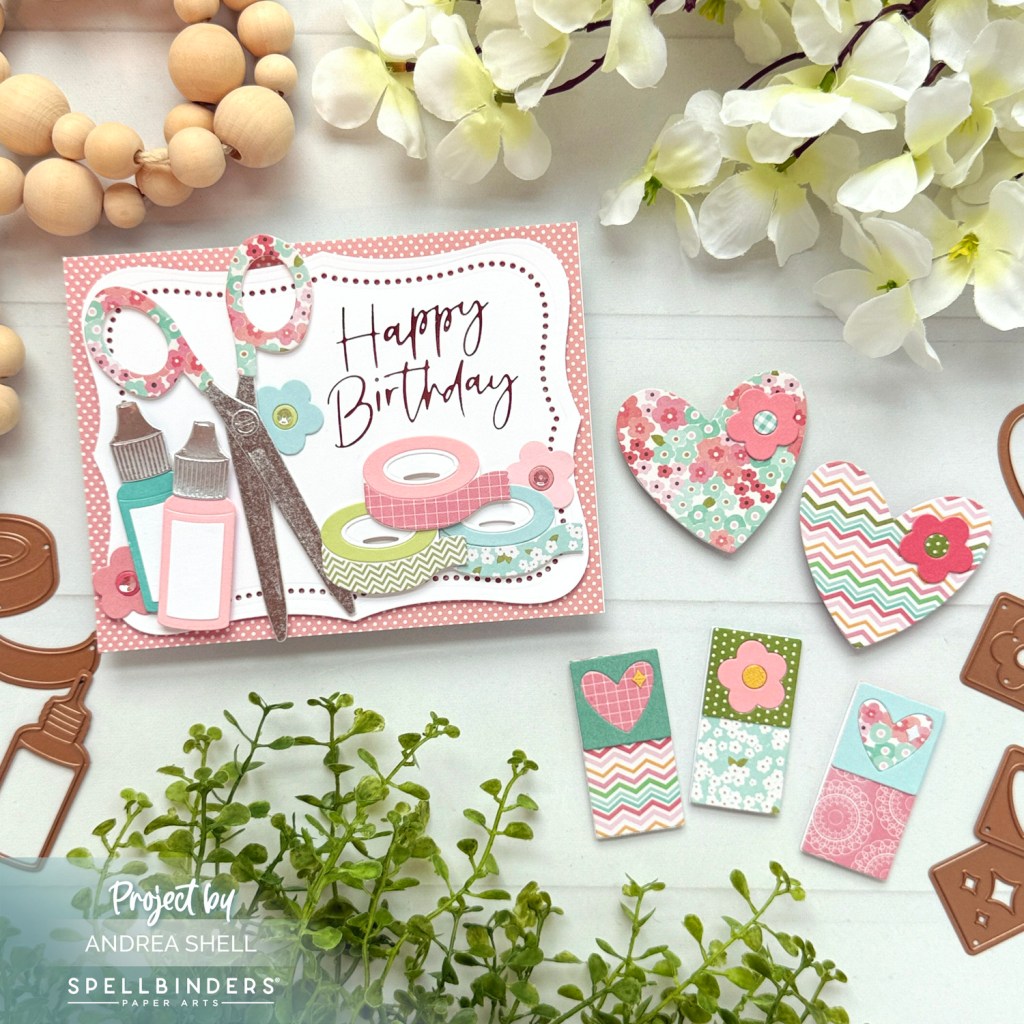
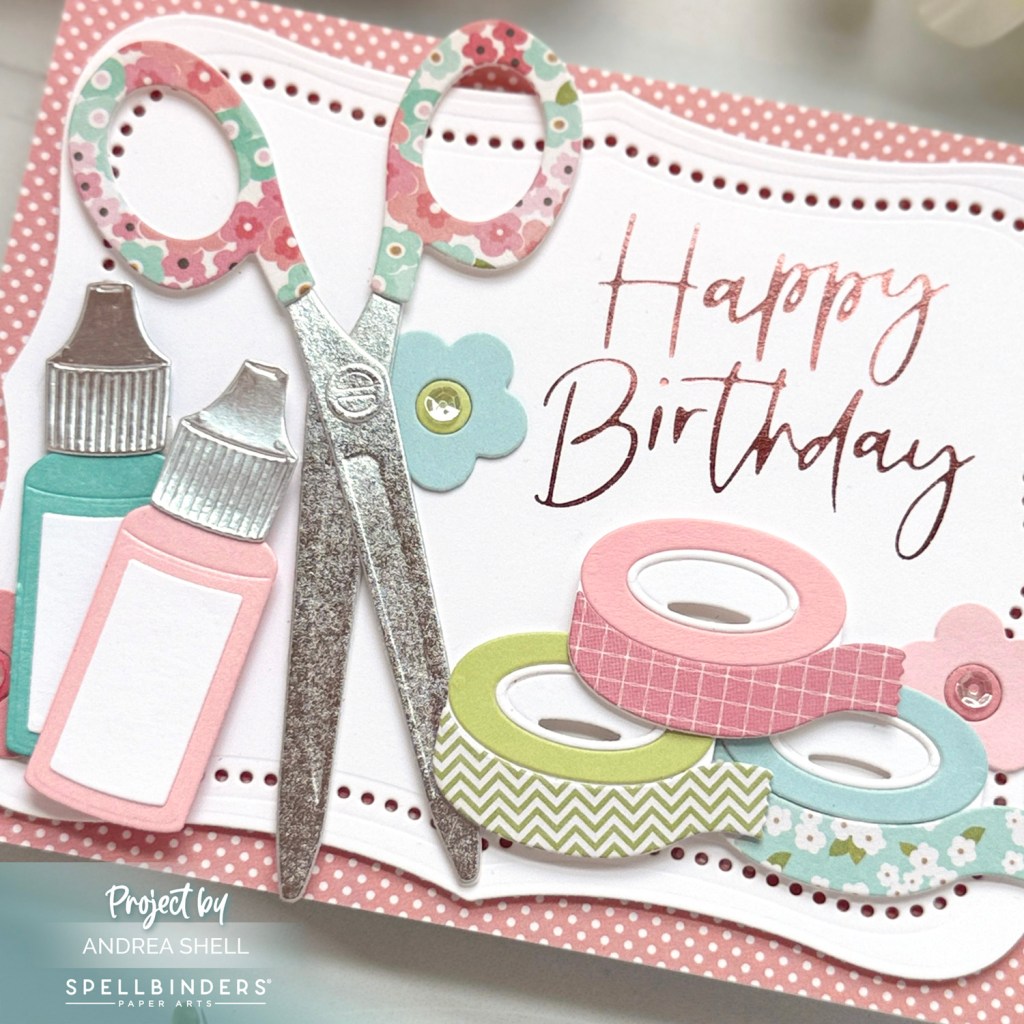
First up is a pastel and floral birthday card featuring the Crafty Tools Dies. These dies are so much fun to play with! I diecut all of the elements from colored, metallic, and white cardstocks, as well as patterned paper, and assembled the diecuts with liquid adhesive.
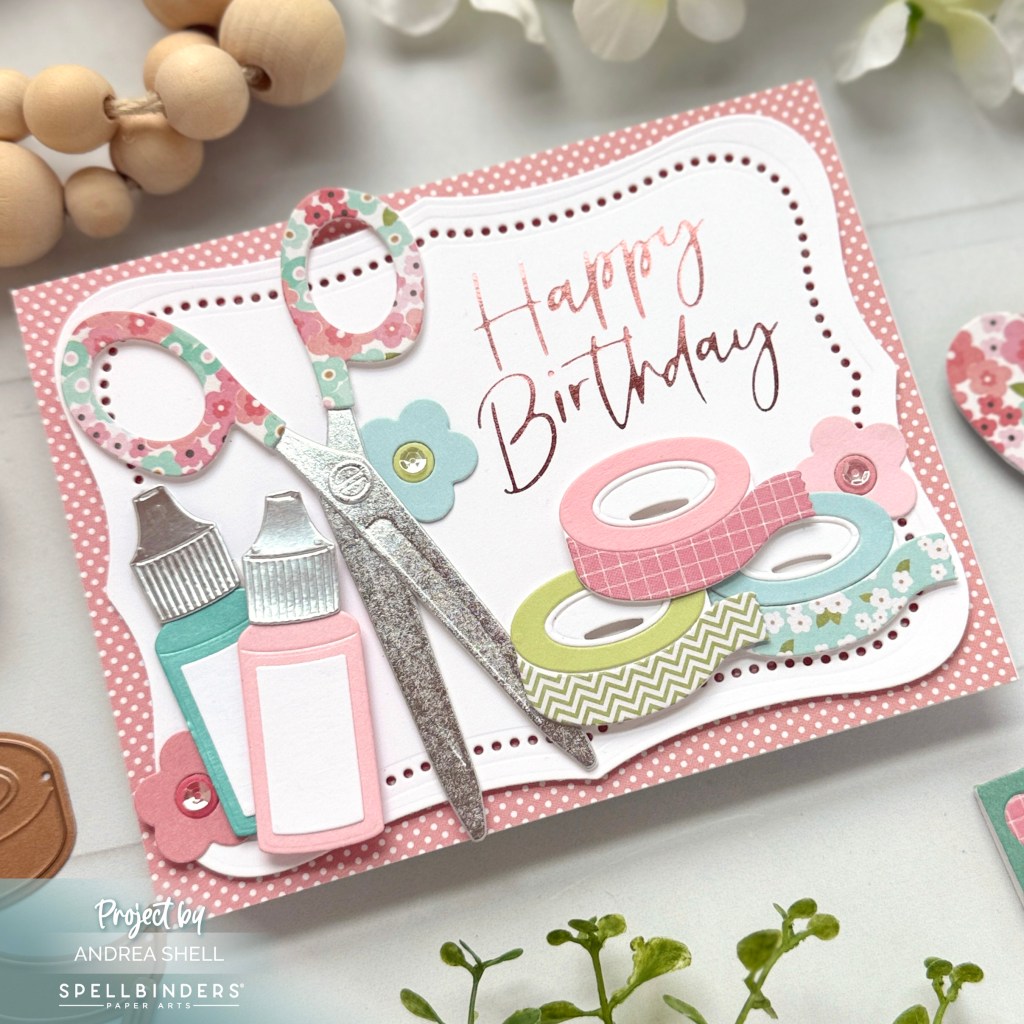
For my background I diecut white cardstock with the Essential Labels Dies (retired) and hot-foiled “happy birthday” from the Stylish Script Thank You & Happy Birthday Hot Foil Plate (retired) with Rose Gold Glimmer Foil. I arranged my diecuts onto my background, securing them with varying heights of foam tape.
I trimmed a polka dot paper from my stash to A2 size, affixed it to a cardbase, and attached my label with foam. Using the Labels & Icons Dies, I diecut a trio of flowers and added them to my card, finishing each with a clear sequin in the center.
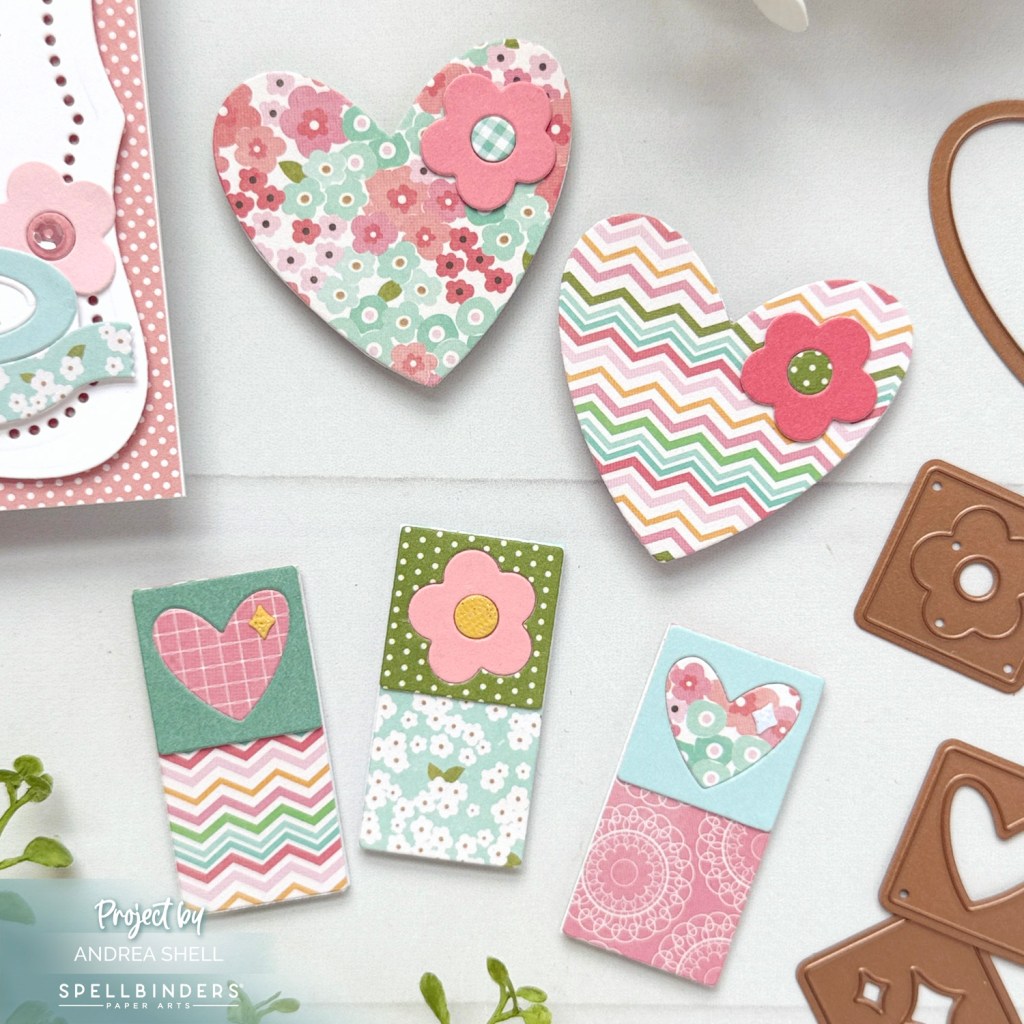
Inspired by the long label die from the Labels & Icons Dies, I decided to create some coordinating bookmarks. They’re super easy to make and turned out so cute!
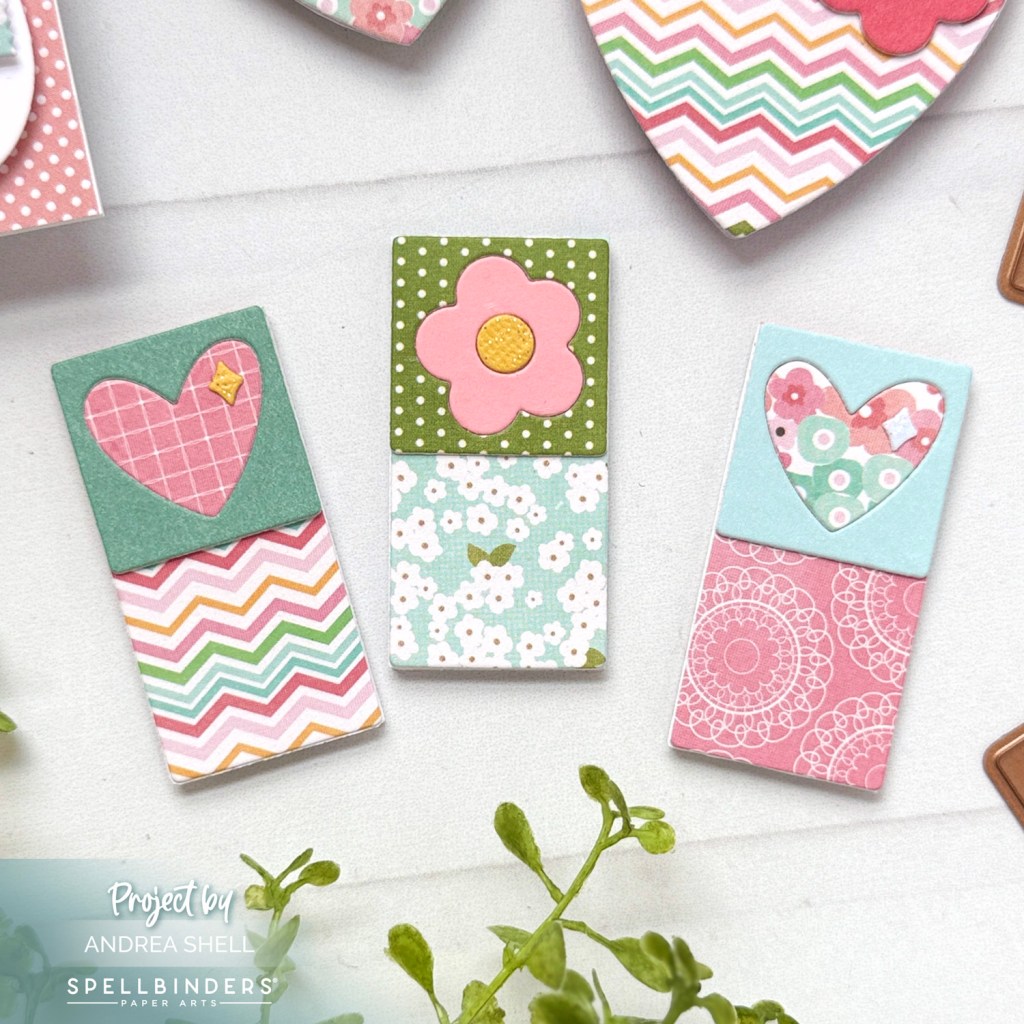
I cut the label die from white cardstock and patterned paper and stacked them to make the bookmarks sturdier. I folded the strips in half and used bits of a magnetic sheet – attached with double-sided adhesive – to close the bookmarks. To decorate the bookmarks, I diecut the flower and heart from the Labels & Icon Dies from patterned paper and white cardstock and stacked them for stability.
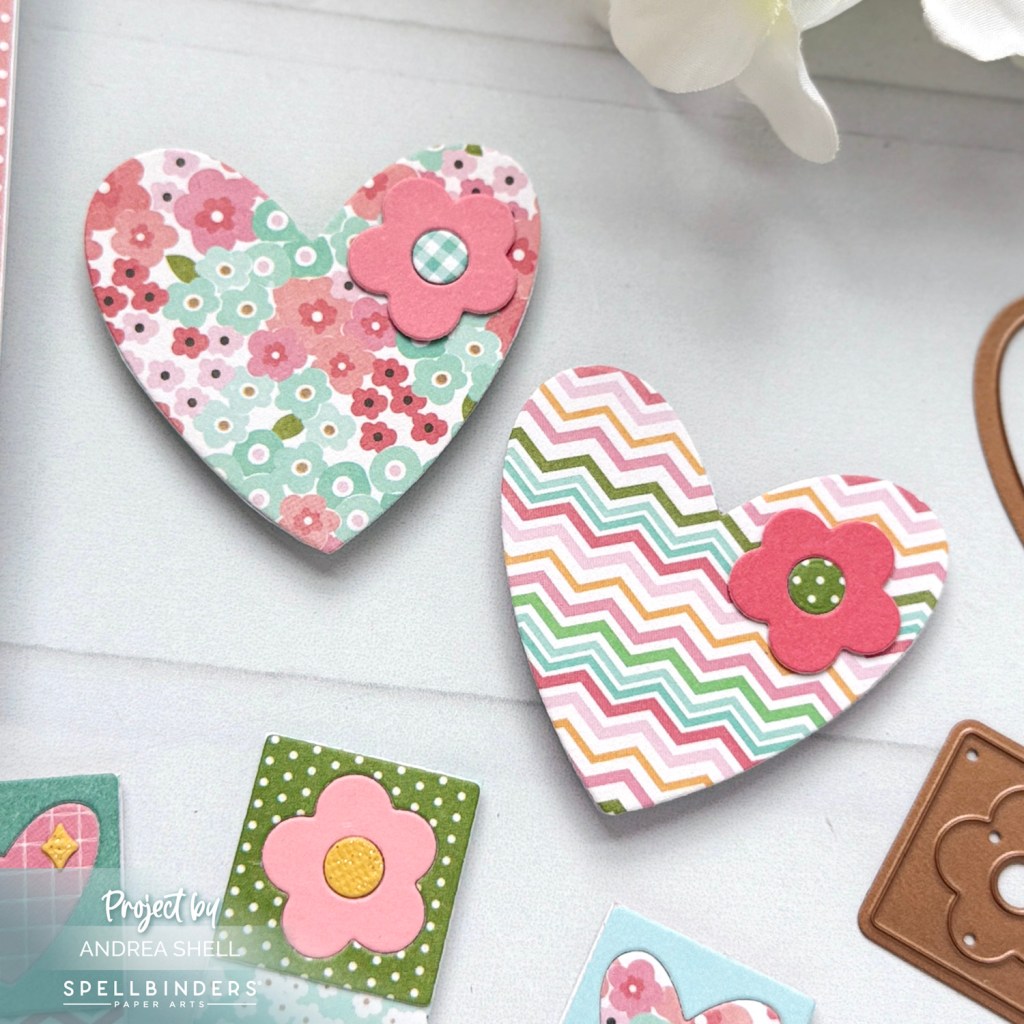
I also used the large heart die from the Labels & Icons Dies to create a pair of bookmarks. For each bookmark I diecut two hearts from patterned paper (different patterns for the front and back) and adhered the hearts back-to-back with double-sided adhesive on the rounded tops of the hearts. Alternatively, you could apply adhesive along the bottom and up the sides of the heart for a corner bookmark. I decorated each bookmark with the flowers from the die set.
Thanks for stopping by!
*Affiliate links used at no cost to you.


Leave a comment