Hi, friends! Spellbinders asked if I would like to create with their new Sealed 3D Botanical Collection, and, naturally, I said yes!
I chose to work with the Mushrooms From Me to You 3D Emboss & Cut Folder, Forest Mushrooms 3D Wax Seal Stamp, and Scallop Label & Tags Dies. These products were a treat to work with, and I couldn’t help making several projects. Do you have a favorite?
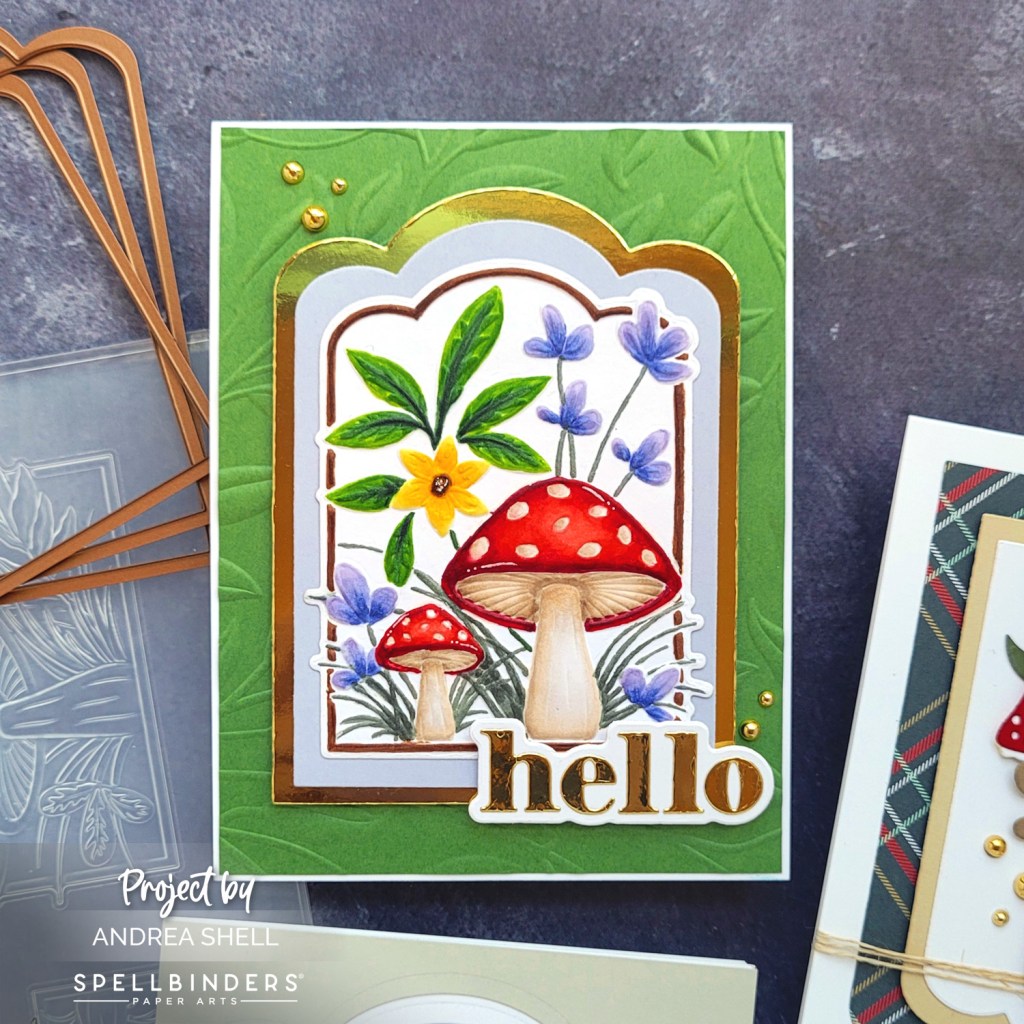
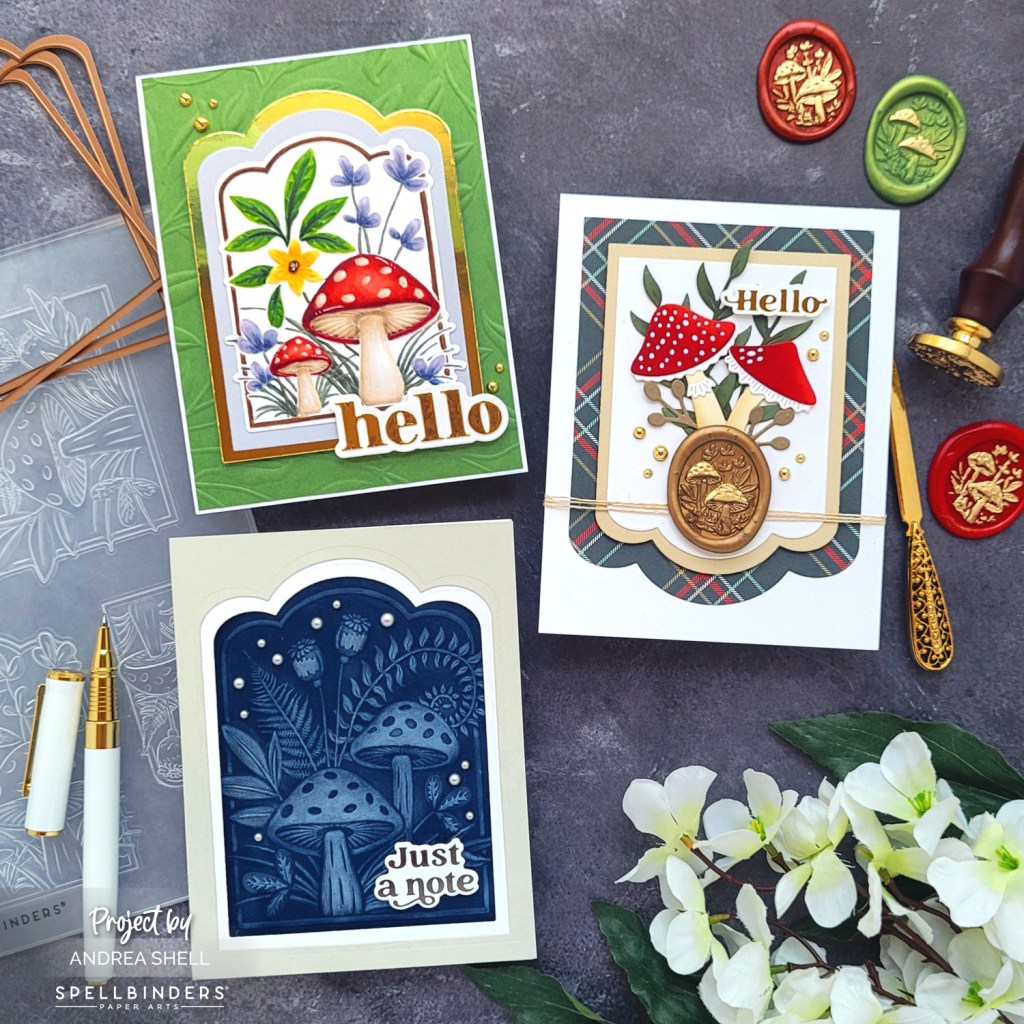
For my first card, I focused on the Mushrooms From Me to You 3D Emboss & Cut Folder. This folder comes with coordinating dies that you place into the folder with your paper. With one pass through your machine, you have three, gorgeous, embossed panels. It’s so easy!
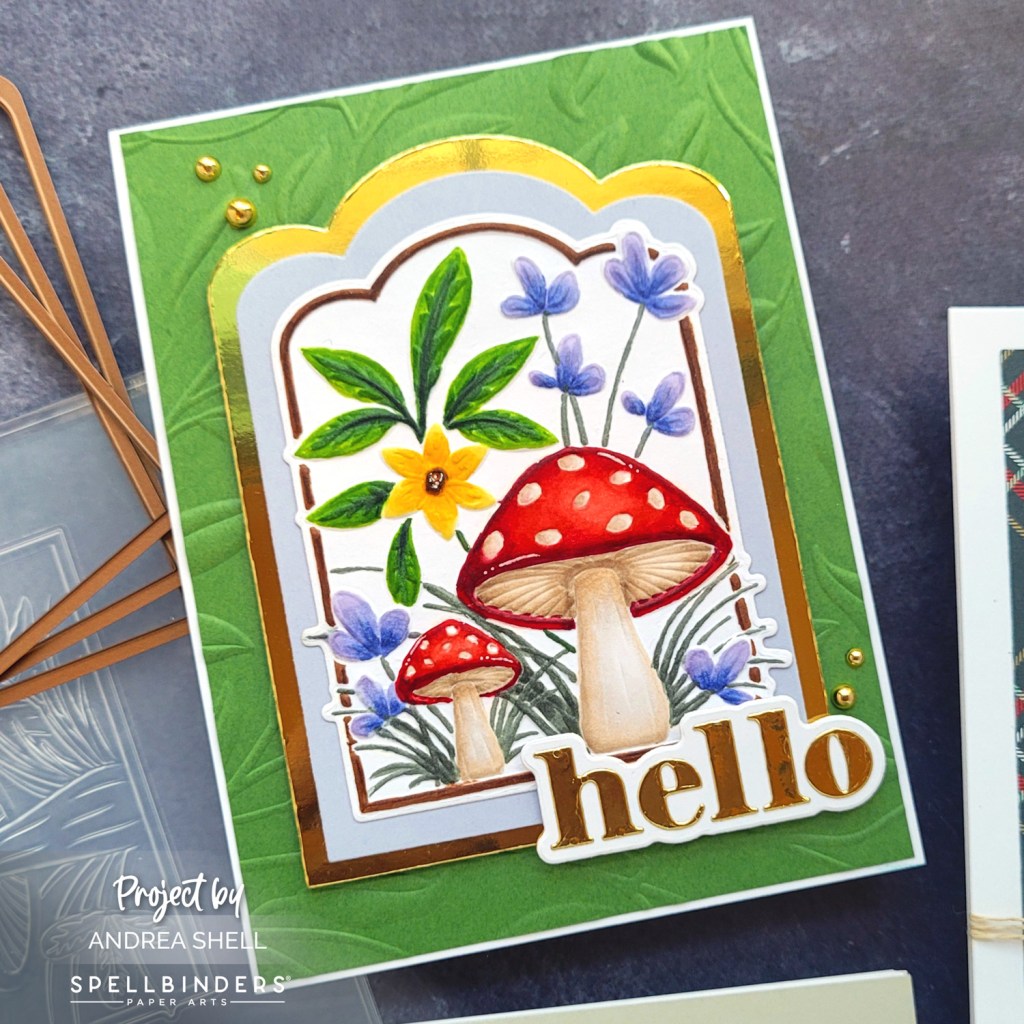
I embossed white cardstock with the folder and then colored the raised parts of the panel with Copics. I added a few white highlights with a gel pen. I love that you get a no-line coloring look with this technique.
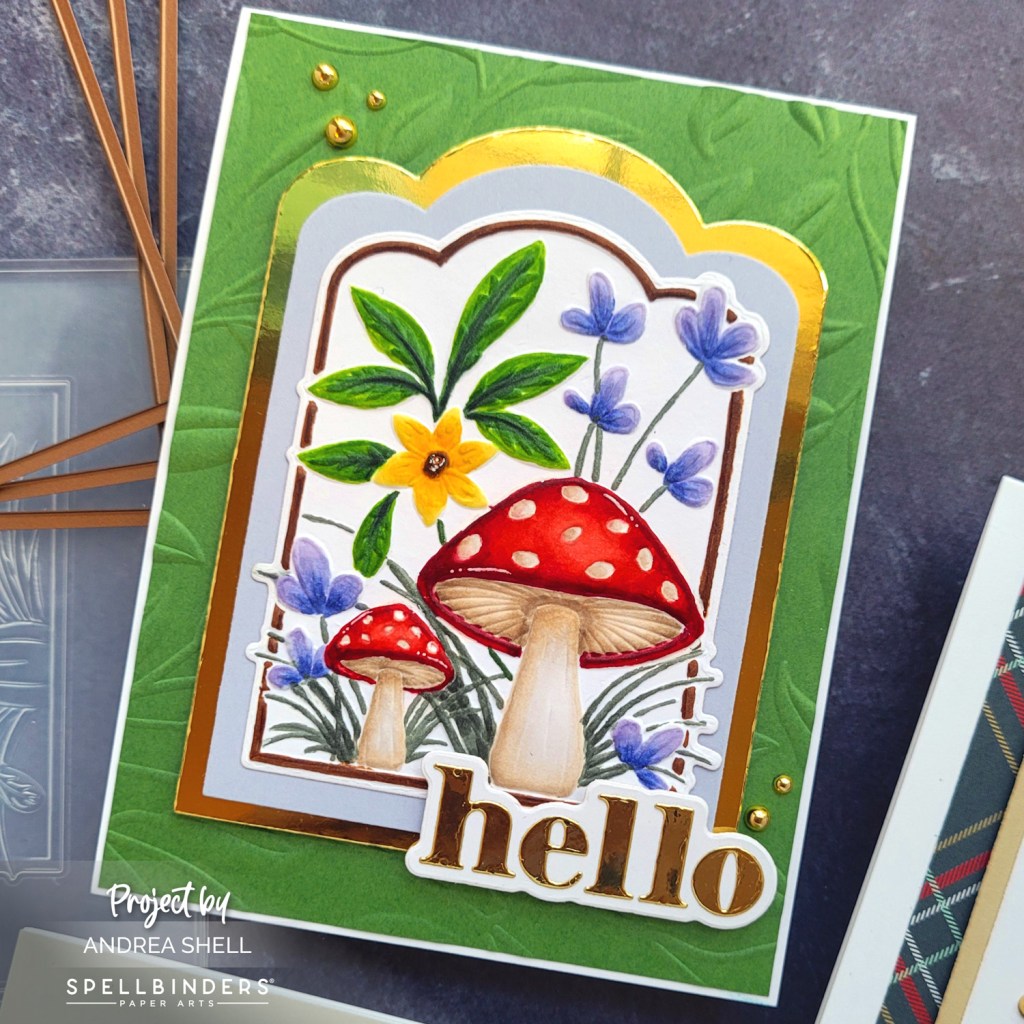
I used the Scallop Labels & Tags Dies to diecut mats from lavender cardstock and gold foil paper. I layered the two mats together and adhered my colored panel on top.
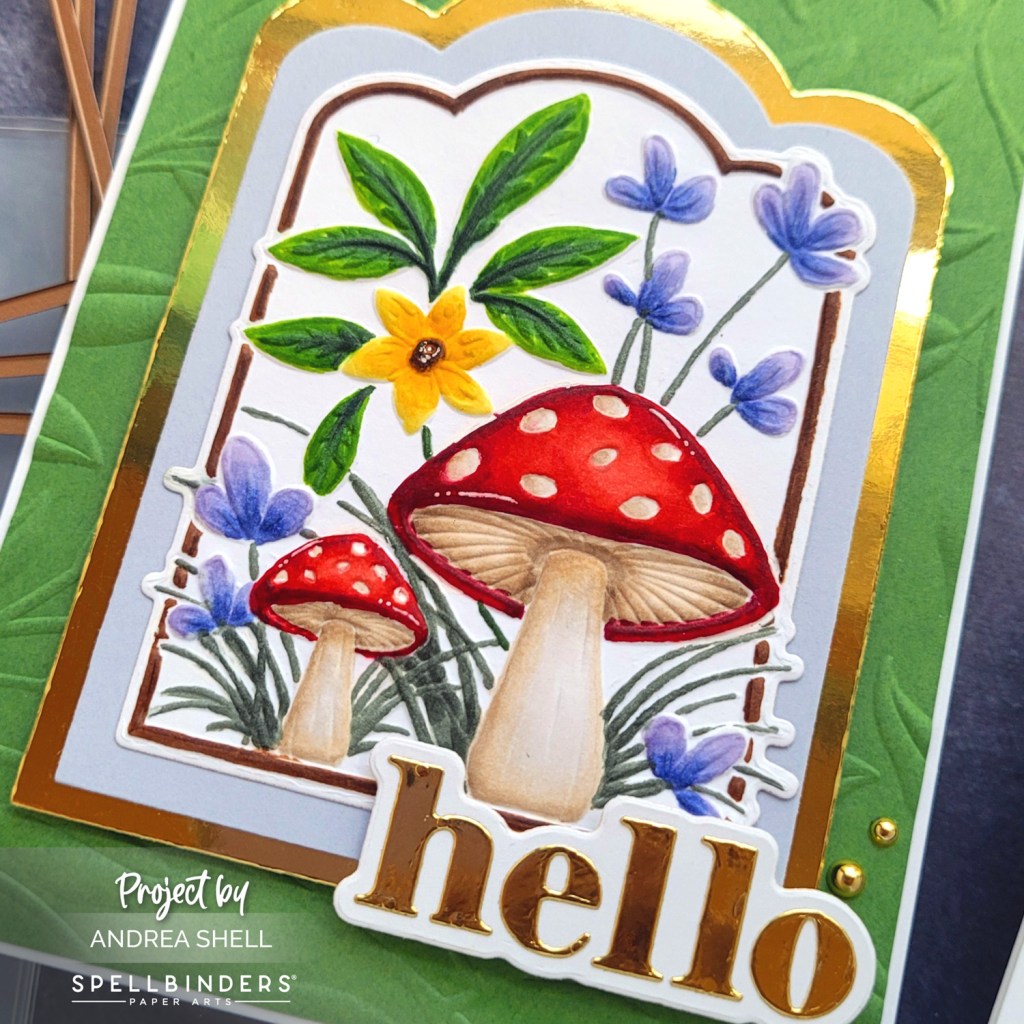
I embossed a panel of green cardstock with the Leafy 3D Embossing Folder and adhered it to a white card. Next, I affixed my layered, scalloped panels with foam tape. I created a sentiment with the Hello Smile Dies and popped it up with foam adhesive. I finished with a few gold drops from my stash.
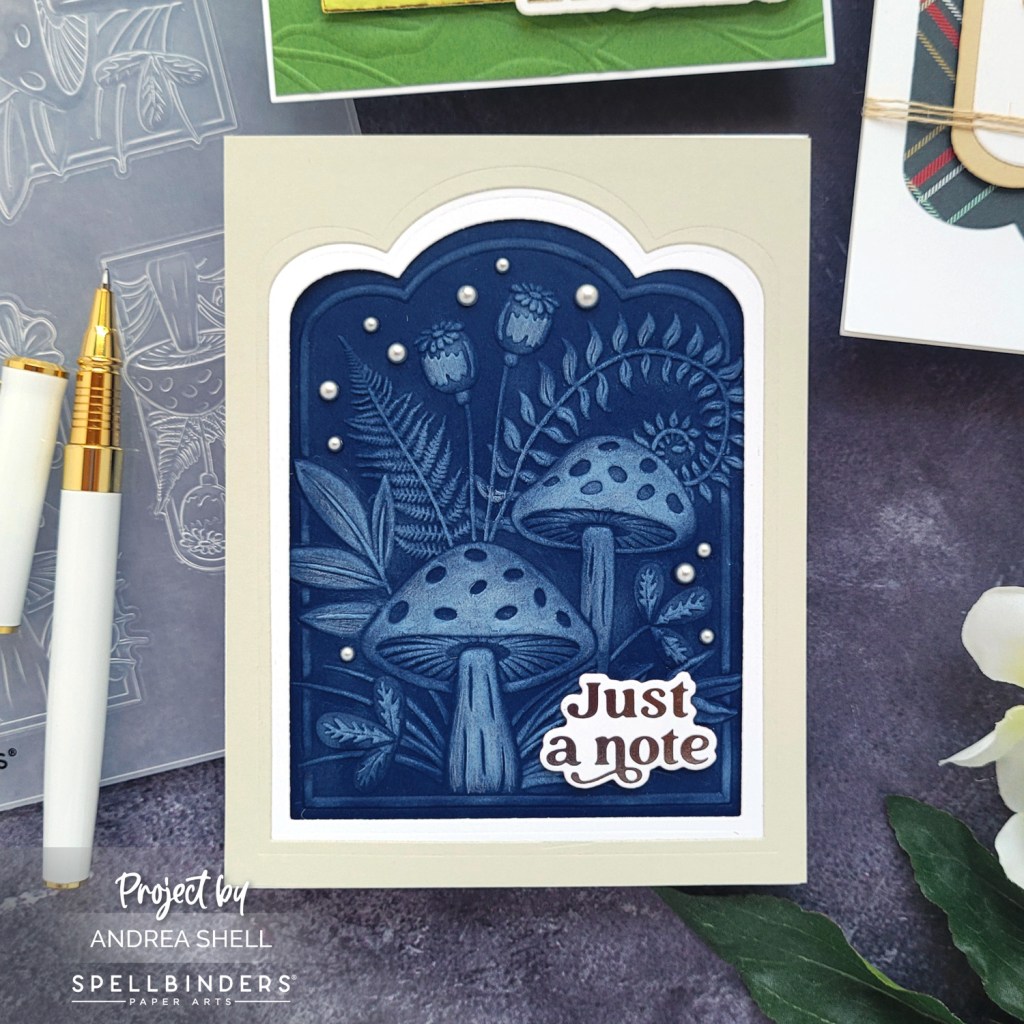
My second card also features the Mushrooms From Me to You 3D Emboss & Cut Folder. For this card, I omitted the dies from the embossing folder and embossed navy cardstock rather than white.
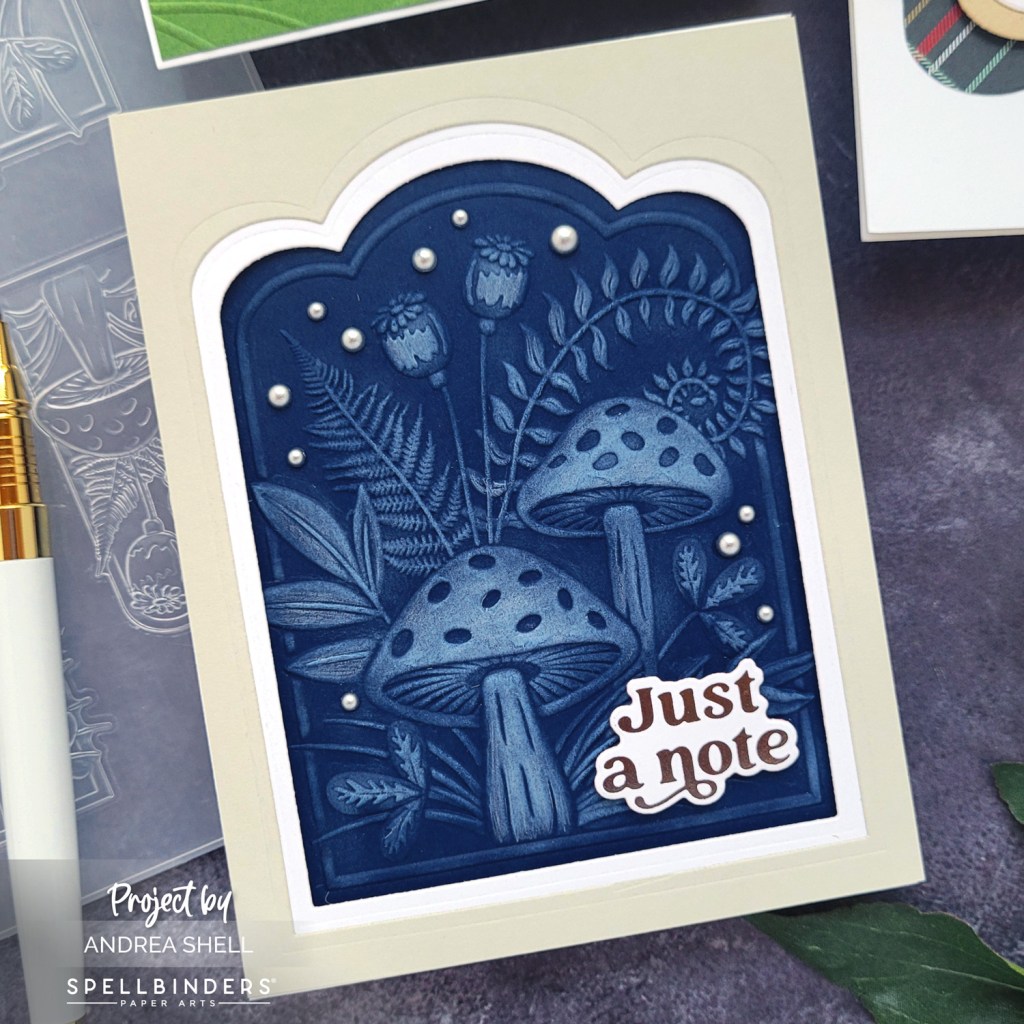
I lightly blended the raised parts of the panel with white pigment ink. To enhance some of the areas, I tried coloring with a white pencil, but I don’t think it was very effective (that may be because I was hesitant to apply much pressure for fear of flattening the embossing).
To frame my image, I diecut gray and white cardstocks with the Scallop Labels & Tags Dies, using a different size for each color. I layered the frames together and adhered them with foam tape to the embossed panel, which I affixed to a cardbase.
My sentiment is from the Must-Have Sentiments Glimmer Hot Foil Plate & Die Set. I foiled it with Pewter Glimmer Foil and diecut it with the coordinating die. I popped up my sentiment with foam adhesive.
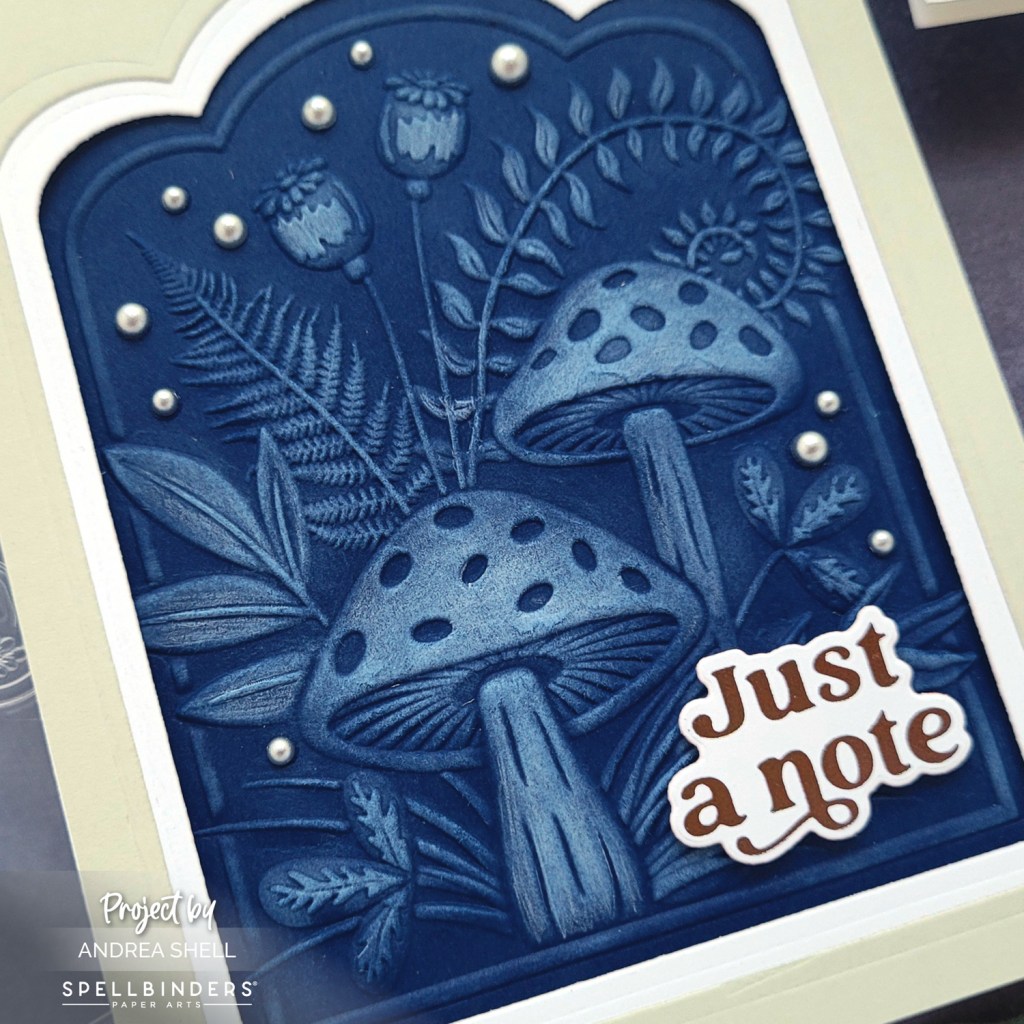
To finish the card, I glued matte silver dots to the panel. I love how this card turned out! It reminds me of the sun prints my daughter used to make.
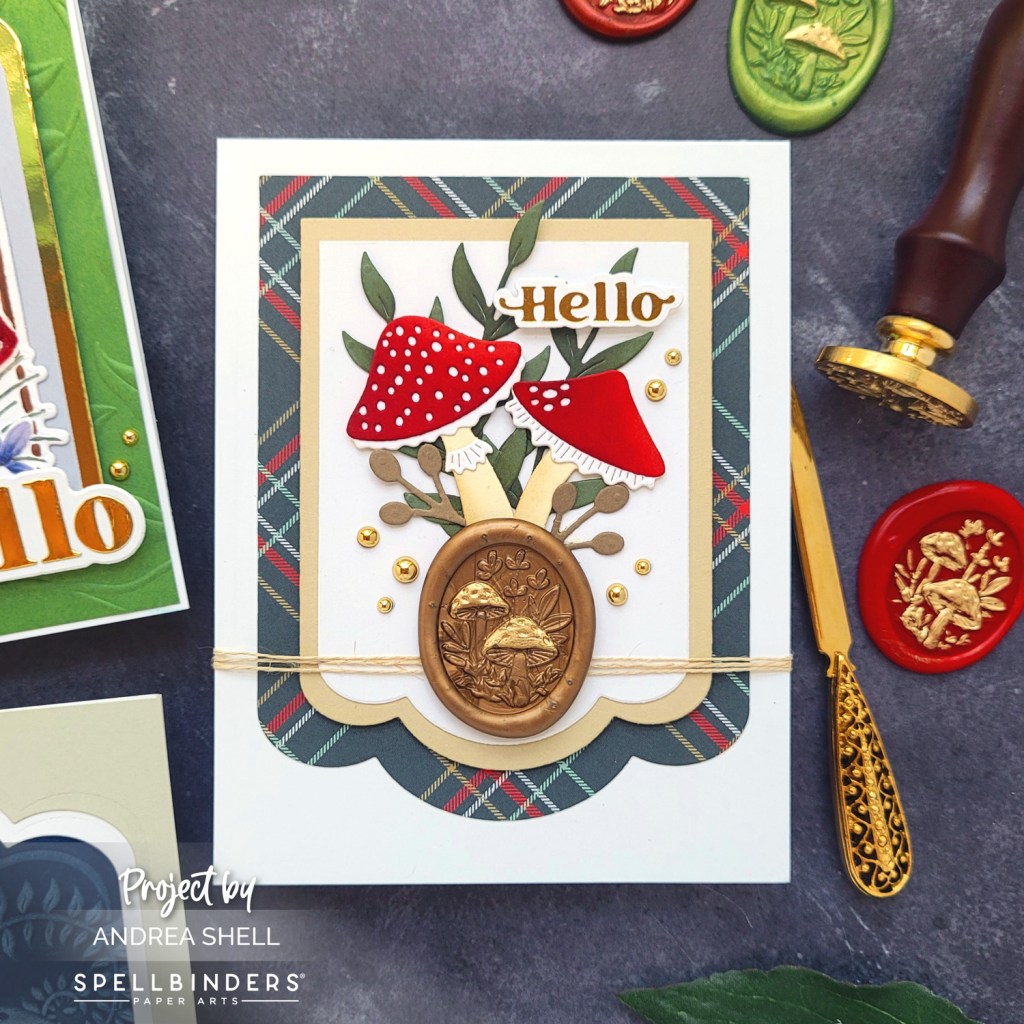
For my third card, I decided to focus on the Forest Mushrooms 3D Wax Seal Stamp. This was actually my first time playing with wax seals, but it was so addictive that I know it won’t be my last! To highlight a portion of the seals, I used a gold metallic paint pen.
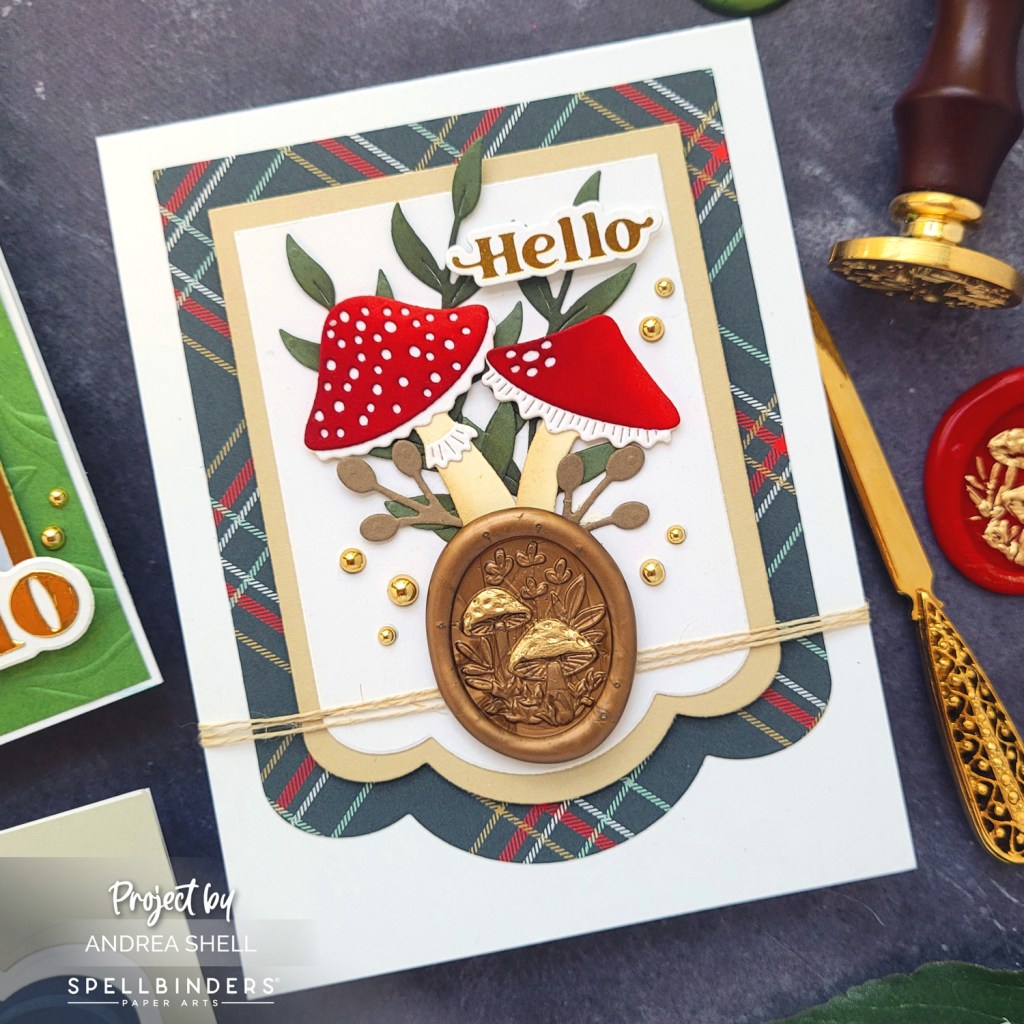
I thought the Autum Wonder Dies would pair perfectly with the wax seal. I diecut the various elements from colored cardstock and blended the diecuts with ink to create some dimension.
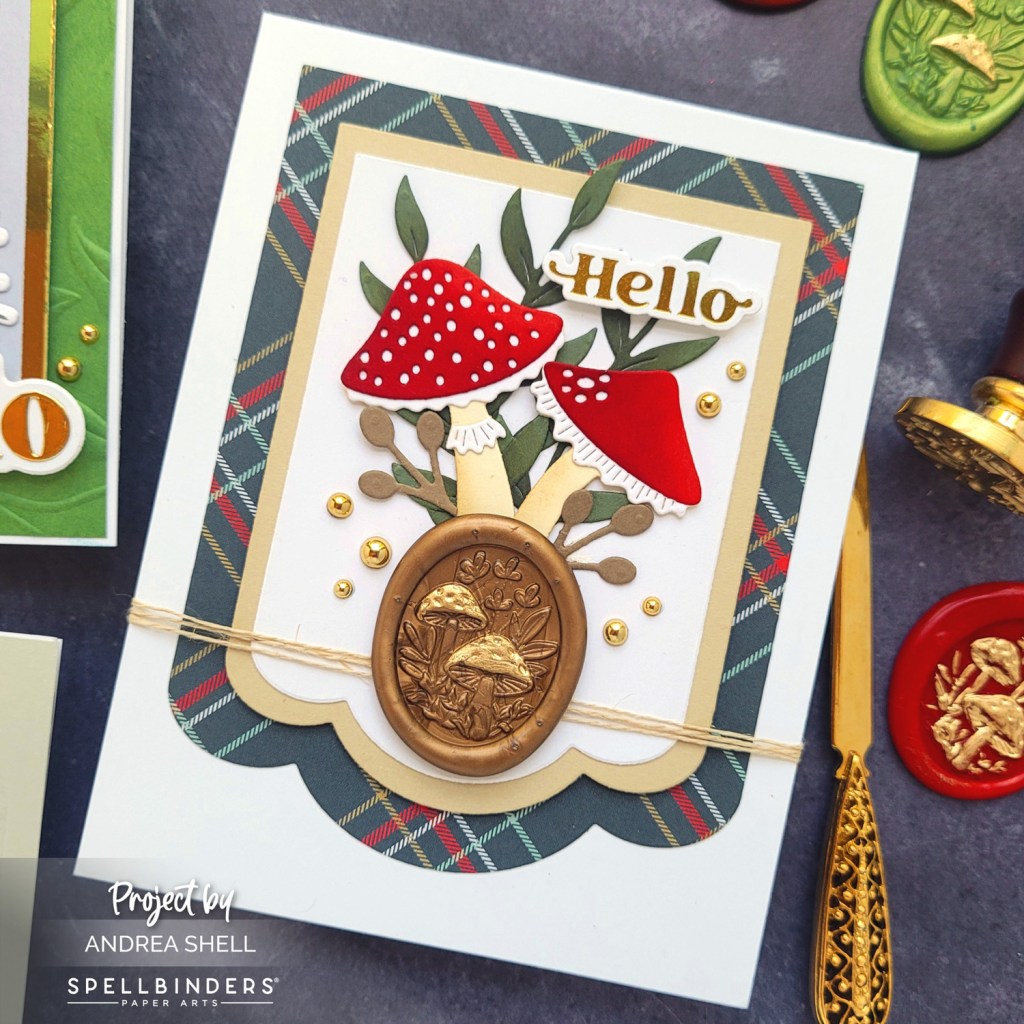
Using the Scallop Labels & Tags Dies, I diecut white and tan cardstocks and a plaid patterned paper. I adhered the plaid panel to a top-folding card. After layering the solid color panels, I affixed them to my card with foam tape.
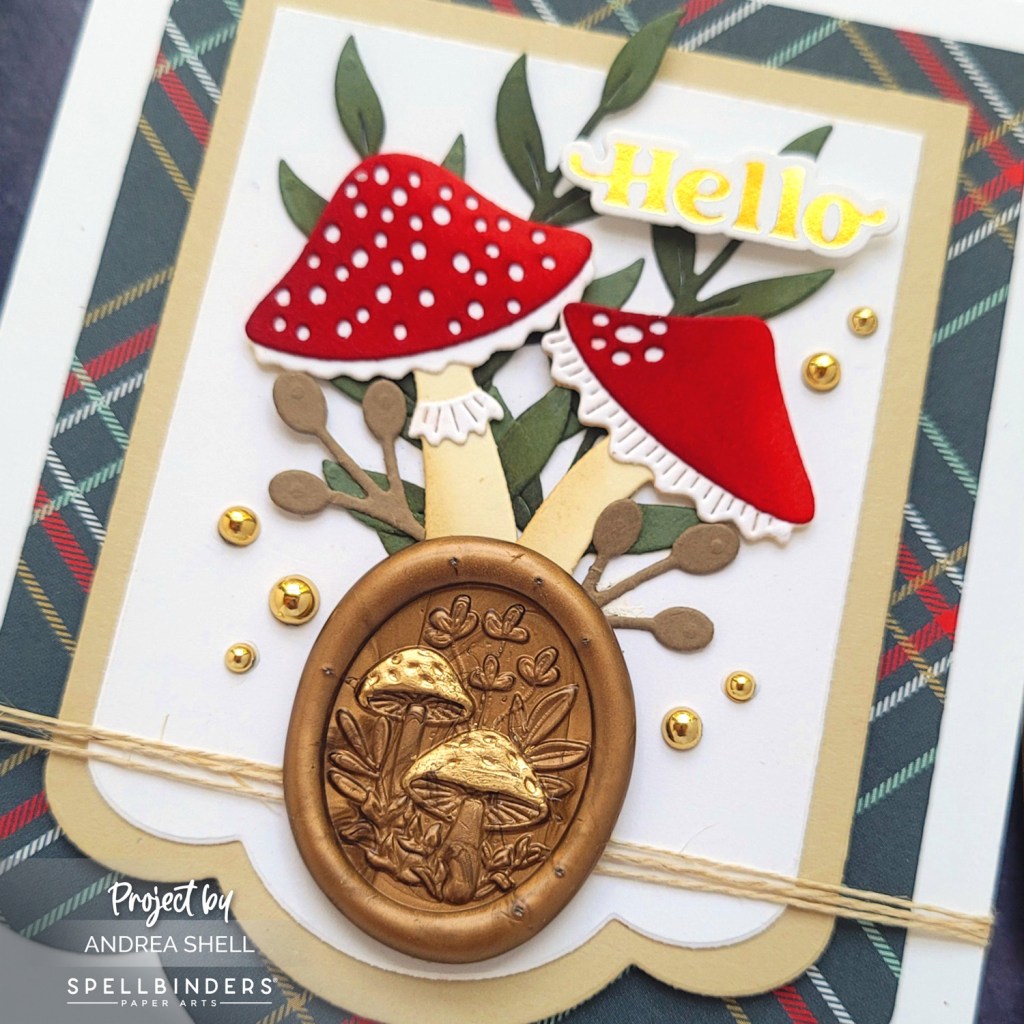
I arranged my foliage and mushrooms onto my card and wrapped some twine around the front of my card, securing it with a glue dot. I adhered my wax seal with another glue dot. I finished my card with a gold-foiled sentiment from the Must-Have Sentiments Glimmer Plate Set and some gold drops from my stash.
Thanks for stopping by!
*Affiliate links used at no cost to you.


Leave a comment